Prepare a screwdriver when you install the HDD.
Make sure you turn off the power, unplug the power cord, and check that all wiring has been disconnected. The cord may be damaged, resulting in electric shock or fire.
Install the designated HDD (model number: C12C934441). Operation cannot be guaranteed if other HDDs are installed.
Electrostatic discharge can damage printer parts. Make sure you discharge static electricity from your body by touching grounding yourself before installing the HDD.
Handle the HDD with care. Excessive force may damage the components.
Turn off the printer by pressing the  button.
Disconnect all cables such as the power cord and USB cable.
Loosen the four screws of the additional interface slot on the back of the printer.
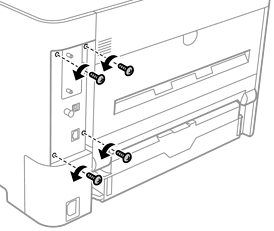
Pull out the additional interface slot. Pull the black parts of the slot straight out and avoid tilting.
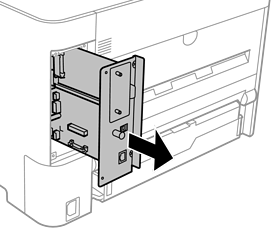
See the following to identify where to place the HDD.
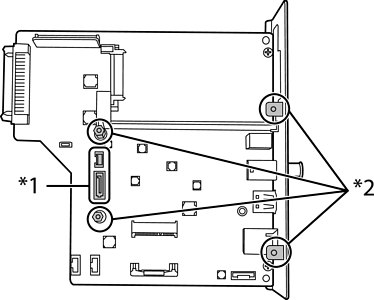
*1: Cable outlet
*2: Screw positions
Confirm the bundled items.
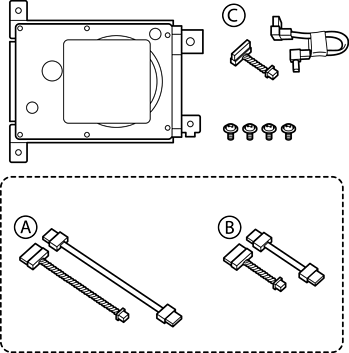
Cable sets A and B are not used.
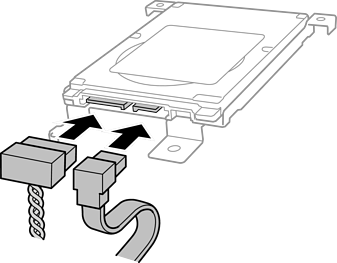
Connect the two cables to the HDD.
Make sure you connect the cables in the correct direction as shown below.
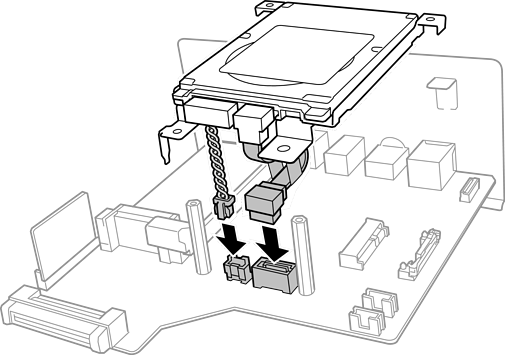
Connect the two cables to the circuit board.
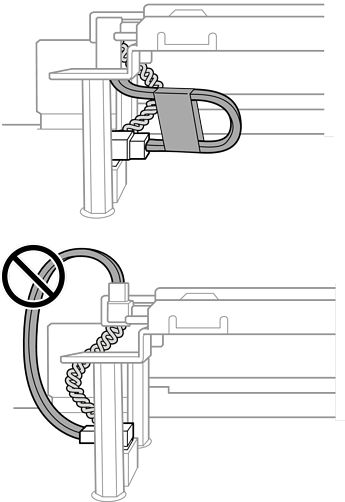
Place the cable under the HDD as shown below.
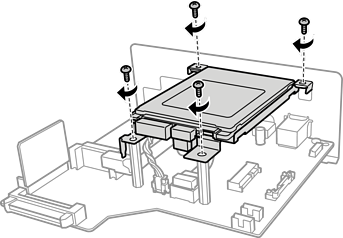
Place the HDD by aligning each of the holes with the screw holes on the printer, and then secure the HDD in place with four screws.
Reinsert the additional interface slot and secure it with the four screws.
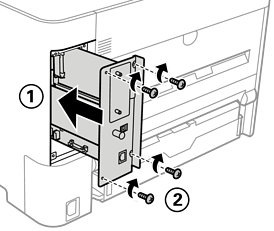
Connect the removed power cord and USB cable.
After installing the HDD, print a Configuration Status Sheet to check if the HDD is installed correctly.
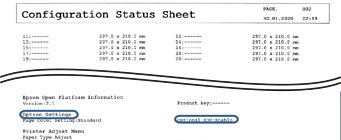
Do not remove the installed HDD. If you reinstall it, the data stored in the HDD cannot be guaranteed and may be deleted.
If you remove the HDD to perform repairs or transport the printer, data could be lost. Make sure you select Option HDD invalid, and then remove the HDD in the reverse order to the installation procedure.