
Make sure you turn off the power, unplug the power cord, and check that all wiring has been disconnected. The cord may be damaged, resulting in electric shock or fire.
Electrostatic discharge can damage printer parts. Make sure you discharge static electricity from your body by touching grounding yourself before installing the Ethernet board.
If Staple Finisher-P2 is installed, the Ethernet board cannot be attached or detached by the customer. If necessary, contact Epson support or an authorized Epson service provider.
Turn off the printer by pressing the  button.
Disconnect all cables such as the power cord and USB cable.
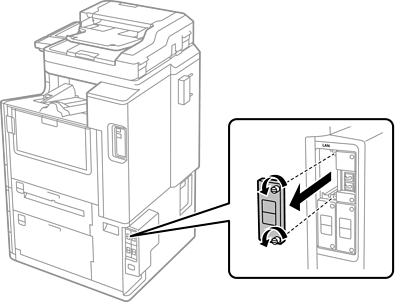
Loosen the two screws and then remove the cover.
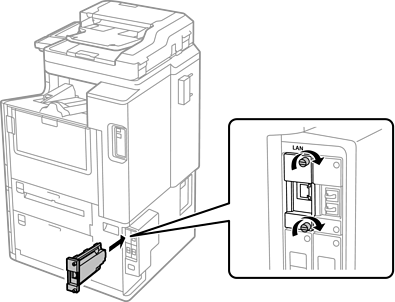
Install the Ethernet board straight into the additional interface slot for the Ethernet board.
Do not remove the cover of the Ethernet board.
Do not touch the terminals of the Ethernet board.
Secure the Ethernet board with the two screws.
Reconnect the power cord and any other cables that you disconnected.
Select the following menu on the home screen of the printer's control panel, and then confirm if the Additional(LAN) is displayed.
Job/Status > Consumables/Others > Options > Additional(LAN)
You need the MAC address of the Ethernet board when setting the administrator password for the additional network. To check this, select Wired LAN Status for the additional network on the printer's control panel to display the details. You can also confirm the MAC address on the label stuck to the Ethernet board.
After installing the Ethernet board, setup the additional network. See the related information below for more details.
If a message is displayed asking you to update the firmware when setting up the Ethernet board, update the printer firmware while the Ethernet board is installed.