
By using the Epson Connect service available on the internet, you can forward received faxes to your cloud accounts.
To use this service, you need to register the user, the printer, and your cloud destinations in Epson Connect, and then register the destinations in the printer.
See Help in the Epson Connect web portal for details on how to setup and register your cloud account.
On a computer connected to the same network as the printer, open a browser and enter the printer's IP address.
You can check the printer's IP address using the following menu.
Enter the administrator password to log in as an administrator.
Select the following menu.
Fax tab > Cloud Destination List
Select the number that you want to register, and then click Edit.
Select the destination you want to register to the cloud destination list.
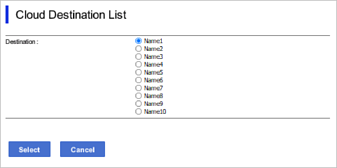
Click Select.
The setting is reflected on the printer.