
The Wireless LAN Interface-P1 may not be available in your country or region.
The foldable sheet attached to the Wireless LAN Interface-P1 has the safety standard certification number on it and should not be removed.
If Staple Finisher-P2 is installed, the Wireless LAN Interface-P1 cannot be detached by the customer. If necessary, contact Epson support or an authorized Epson service provider.
Turn off the printer.
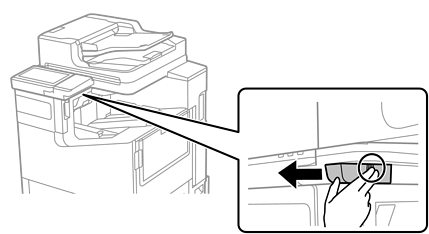
Place your hand on the cover located beneath the authentication device table and gently pull it toward you to remove it.
With the foldable sheet of the Wireless LAN Interface-P1 facing you, carefully align the USB connector with the Wi-Fi unit port and gently insert it.
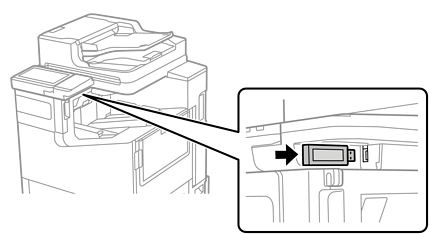
As the insertion port is narrow and not easily visible, be sure to check the orientation of the connector carefully before inserting it.
Forcing the connector into place may damage the connection.
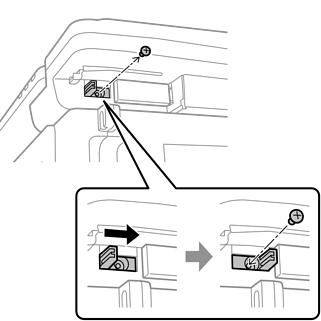
When locking the Wireless LAN Interface-P1, use a Phillips head screwdriver to remove the screw, taking care not to drop it inside the printer.
Slide the lock lever toward the wireless LAN unit and then fix it with the screw.
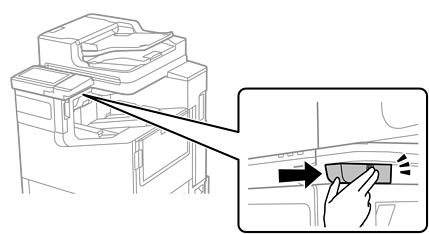
Reattach the cover.
Turn on the printer and check that  is displayed on the control panel.
If is not displayed, turn the printer off and then on again.