
Open the print screen of your application software.
Open the More Options tab on the printer properties screen.
Select Print Sets, and then click Settings.
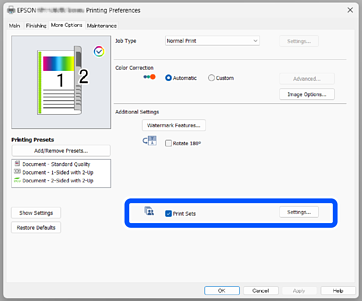
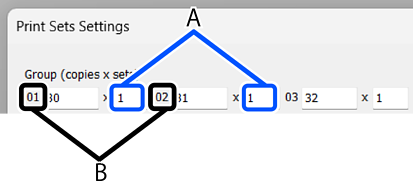
Set the number of copies and sets in Group (copies x sets).
For example, if you wanted to print handouts for four classes (Class 1: 30 students, Class 2: 31 students, Class 3: 32 students, Class 4: 30 students) in a school, you would select the following settings.
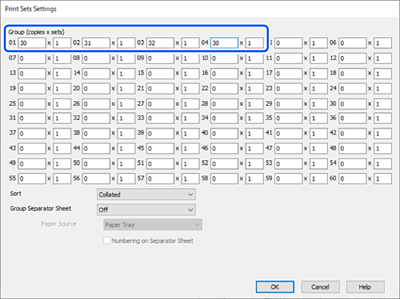
If multiple classes need the same quantity, you can group them together by changing the number of sets (set count). For example, if Group 01 and Group 04 shown above both need the same amount, set Group 01's set count to 2 instead of setting up Group 04 separately.
Use Sort to set the printing order.
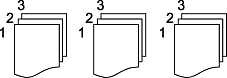
Selecting Collated will collate each copy in page order.
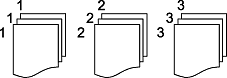
Selecting Uncollated will produce copies grouped by page.
In Group Separator Sheet, you can configure insert sheets (separator sheets).

 If you select Each Set, the slip sheets are inserted in units of (A). If you select Each Group, the slip sheets are inserted in units of (B).
 Specify the Paper Source that contains the sheets to be used as slip sheets.
You can use Group Shift Sort to shift the paper during output.
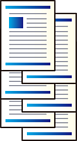
If you select Each Set, it shifts the paper in units of (A). If you select Each Group, it shifts the paper in units of (B).
Once all settings have been completed, click OK to close the group print settings screen.
Configure the settings on the Main, Finishing, and More Options tabs on the printer properties screen.
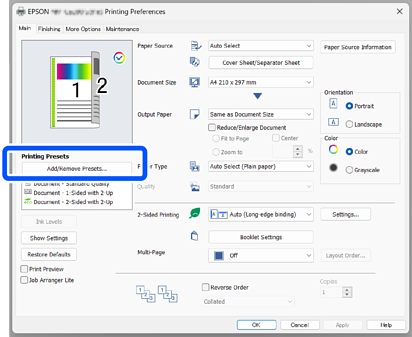
From the Main tab or More Options tab, click Add/Remove Presets under Printing Presets.
Enter a Name and Comments (optional), and then click Save. The setting name you entered is added to the Printing Presets.
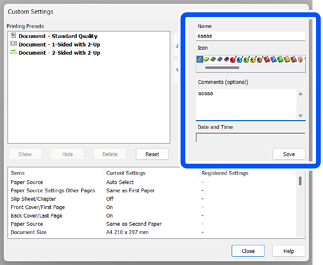
Click Close.