
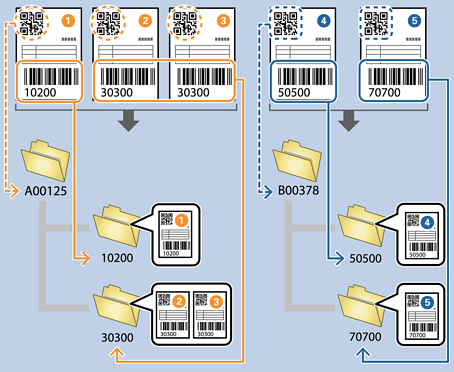
Create a two-level folder using two types of barcodes
You can use the two types of barcode information on the document to create and save a two-level folder.
This section explains how to set up a job that "creates a folder with the first barcode information, and then creates a folder with the second barcode information below it in the folder structure".
-
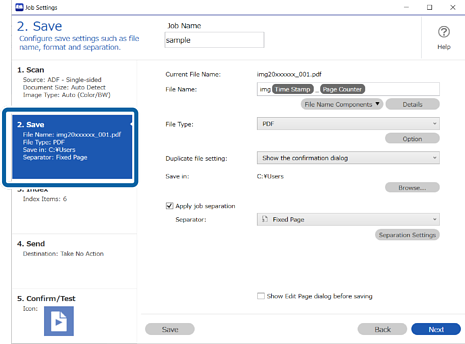
1Display the Job Settings screen, and then click the 2. Save tab.
-
2Select Apply job separation, set Separator to Barcode, and then click Separation Settings.

-
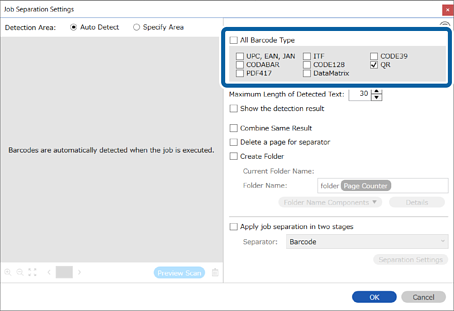
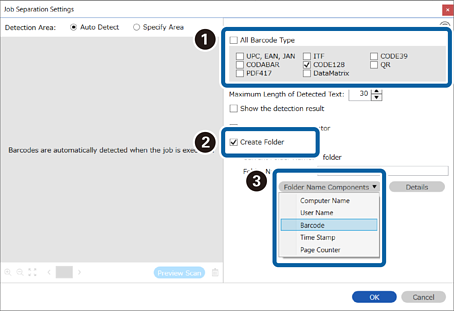
3On the Job Separation Settings screen, select the type of barcode you want to use for the first folder.
Clear All Barcode Type to select individual barcode types.
In this example we will select a QR code.
-
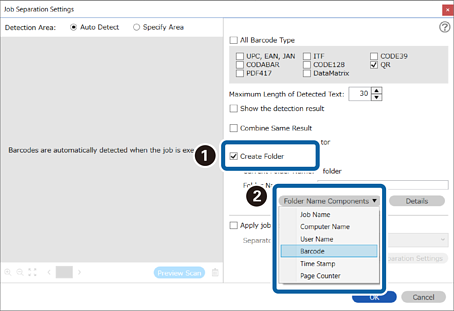
4Select Create Folder, and then select Barcode from Folder Name Components.
 Note:
Note:You can use your cursor to specify where you want to add Folder Name Components.
You can also change the order of components by selecting added items and dragging/dropping them.
If you want to delete a component, select the added item and delete it using the Delete key on your keyboard.
-
5Select Apply job separation in two stages, set Separator to Barcode, and then click Separation Settings.

-
6Additionally, on the Job Separation Settings screen, select the type of barcode you want to use for the second folder, select Create Folder, select Barcode from Folder Name Components, and then add it to Folder Name.
Clear All Barcode Type to select individual barcode types.
In this example we will select CODE128.
 Note:
Note:-
You can use your cursor to specify where you want to add Folder Name Components.
You can also change the order of components by selecting added items and dragging/dropping them.
If you want to delete a component, select the added item and delete it using the Delete key on your keyboard.
-
When using a 2D barcode with a lot of information, specify the maximum number of characters to be used for separating in Maximum Length of Detected Text.
-
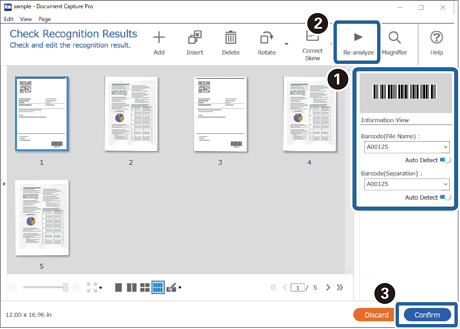
If you want to check if the barcode has been recognized correctly, select Show the detection result. You can check the recognized area and text on the screen displayed after scanning. You can also re-specify the area to be recognized, or correct the text.
-
