 /
Scanning (Customized) /
Creating a New Job
/
Scanning (Customized) /
Creating a New Job
Creating a New Job
This section explains how to create a new job.
You can create up to 30 jobs.
-
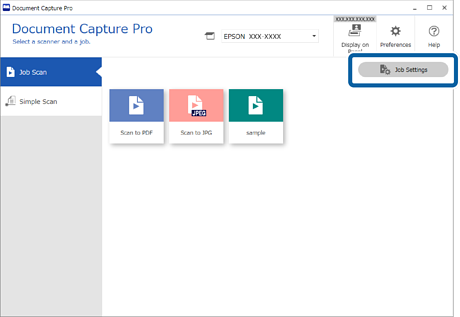
1Click Job Settings on the Job Scan screen.
-
2Click New Job.
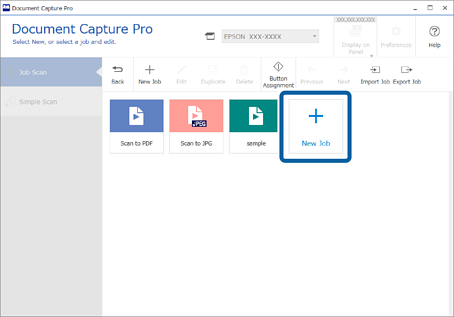 Note:
Note:To create a new job based on another job, click the job you want to use as the base, and then click Duplicate.
The Job Settings window is displayed.
-
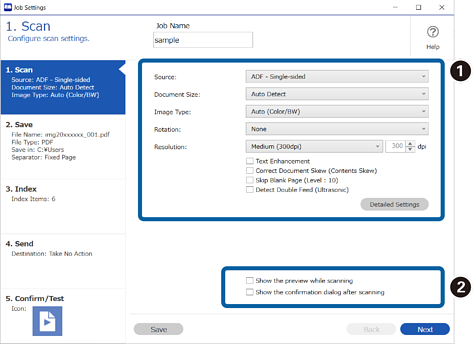
3Enter a Job Name.

-
4On the 1. Scan tab, set the scan job operations you want to create.
-
 Make basic scanning settings.
To make more advanced settings, click Detailed Settings to open the settings screen. Change the scan operation and click Save to return to the Document Capture Pro screen.
Make basic scanning settings.
To make more advanced settings, click Detailed Settings to open the settings screen. Change the scan operation and click Save to return to the Document Capture Pro screen. -
 Change the settings as necessary.
Select Show the preview while scanning to display images while scanning.Select Show the confirmation dialog after scanning to display a confirmation message asking if you want to continue scanning after completing a scan.
Change the settings as necessary.
Select Show the preview while scanning to display images while scanning.Select Show the confirmation dialog after scanning to display a confirmation message asking if you want to continue scanning after completing a scan.
When you have finished making scanning settings, click Next or the 2. Save tab.
-
-
5On the 2. Save tab, you can make settings for saving the scan results.

-
Set the name of the file.
When you select a component you want to use for the file name from File Name Components, it is added to the file name. You can also enter a name directly in File Name.If you want to add barcodes, OCR, and forms, you need to make settings in advance. Click Details.You can also change the Time Stamp and Page Counter format from Details.
-
Set the file save format, the save location, and processing when a file name is duplicated.
Option may be enabled depending on the File Type; click to make detailed settings.
-
 When you want to separate jobs, select this to choose the separation method, and then select Separation Settings to make detailed settings.
-
 Change the settings as necessary.
When you select Show Edit Page dialog before saving, you can make edits on the Edit Scanned Results screen after scanning.
Change the settings as necessary.
When you select Show Edit Page dialog before saving, you can make edits on the Edit Scanned Results screen after scanning.
When you have finished making save settings, click Next or the 3. Index tab.
-
-
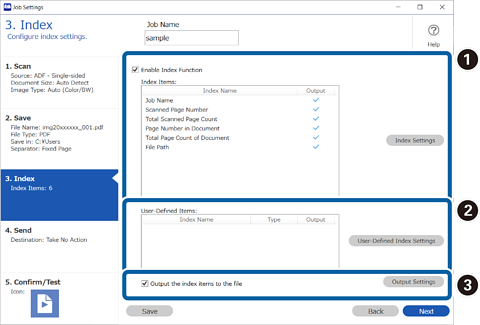
6You can make index file settings on the 3. Index tab.
-
When creating an index file, select Enable Index Function.
Click Index Settings and select the items you want to use for the index.
-
You can also specify barcodes, OCR, and MRZ in passports and travel documents as index entries. Click User-Defined Index Settings to set a user-defined index.
-
Select Output the index items to the file, and then click Output Settings to set the output items and file name used when outputting to a file.
When you have finished making index settings, click Next or the 4. Send tab.
-
-
7Set the destination settings on the 4. Send tab.
When Destination is selected, setting items are displayed according to the send destination.
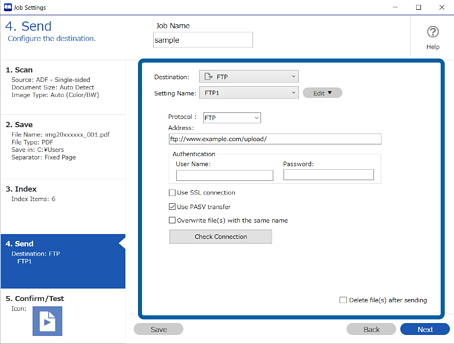
When you have finished making transfer settings, click Next or the 5. Confirm/Test tab.
-
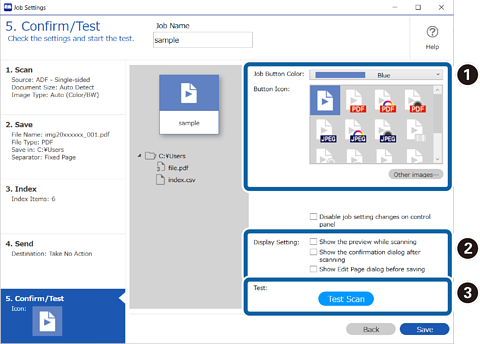
8Check the settings on the 5. Confirm/Test tab, and then perform a test scan.
-
Change the job button color or icon.
-
Change the display settings used during and after scanning.
-
Perform a test scan using the job that is currently set.
-
-
9Click Save to finish creating the job.
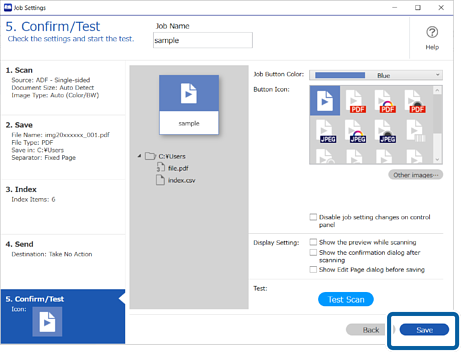
If you go on to create a new job, make edits, duplicate, delete, and so on, continue to make settings.
To finish making job settings, click the Back button on the left of the toolbar to return the job screen.
If you want to run a saved job from the scanner's button, click Button Assignment and assign the job to the scanner's button.

