
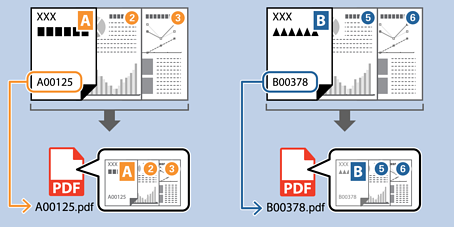
Saving file names using OCR characters
Some items and settings may not be available depending on the scanner you are using.
With OCR (a function that detects text information in a scanned image and converts it into text data), you can read text from a specified area, split a file by that text, or create and save a folder.
This section explains the job settings for "Saving using text in the file name read by OCR".
-
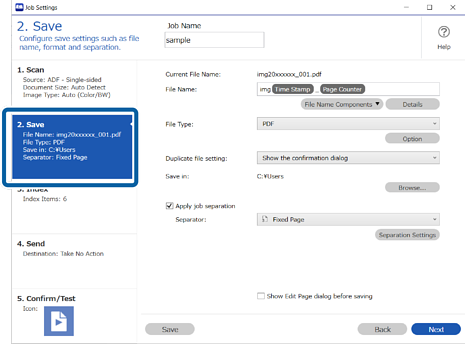
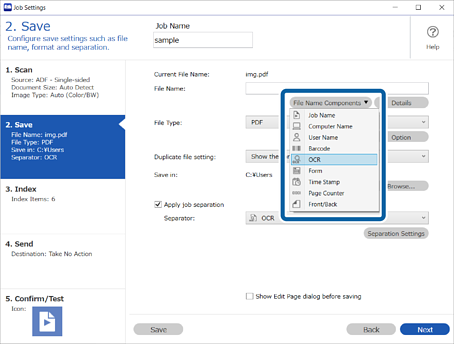
1Display the Job Settings screen, and then click the 2. Save tab.
-
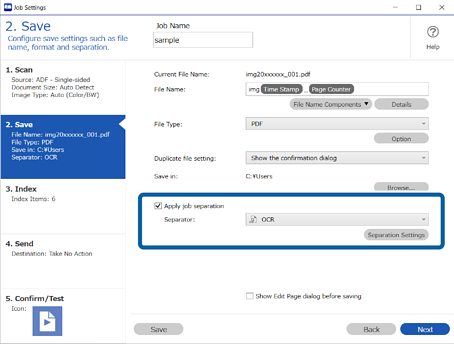
2Select Apply job separation, set Separator to OCR, and then click Separation Settings.
-
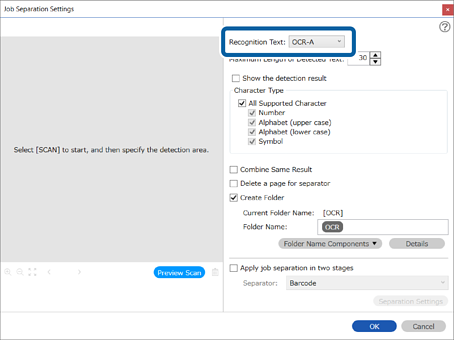
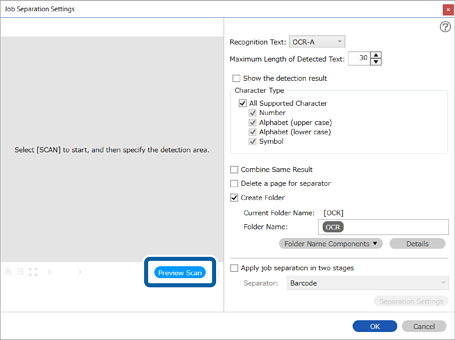
3On the Job Separation Settings screen, select the type of text being read from Recognition Text.
-
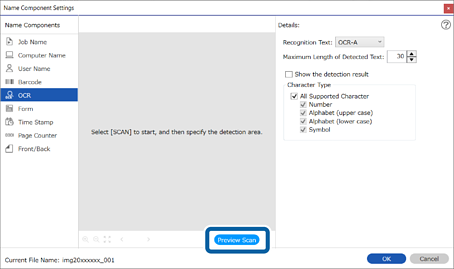
4To specify the OCR detection area, place the originals on the scanner, and then click Preview Scan.
-
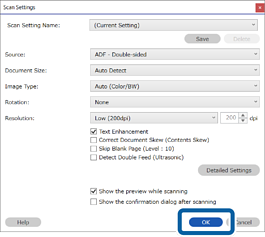
5Click OK on the Scan Settings screen.
-
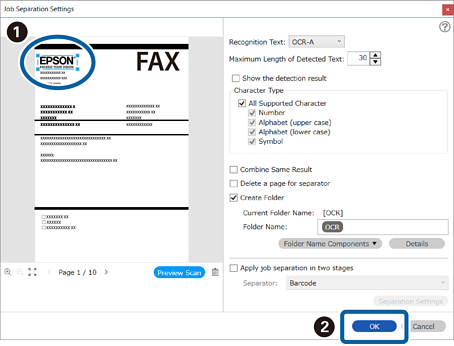
6In the scanned preview image, specify the text detection area. Click and drag from the starting point to display a blue box that you can use to specify the area. Click OK to return to the Job Settings screen.
-
7Click Details.
 Note:
Note:To select OCR from File Name Components, you need to make settings in Details before you can select it.
-
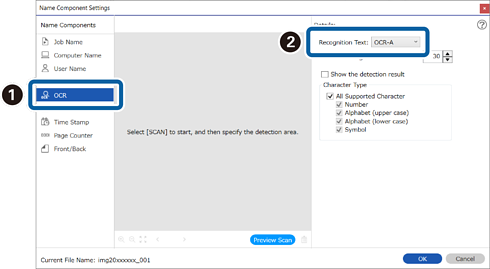
8Select OCR on the Name Component Settings screen, and then select the type of text being read from Recognition Text.
Set the type of text to be read to the same setting as in step 3.
-
9To specify the OCR detection area, place the originals on the scanner, and then click Preview Scan.
-
10Click OK on the Scan Settings screen.
-
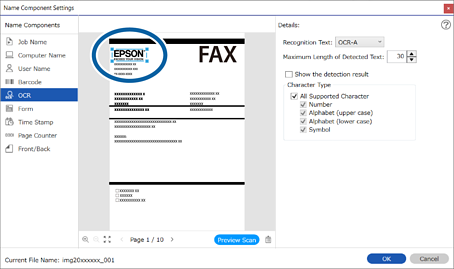
11In the scanned preview image, specify the text detection area. Click and drag from the starting point to display a blue box that you can use to specify the area.
Specify the same area as in step 6.
 Note:
Note:-
Maximum Length of Detected Text allows you to specify the maximum number of characters that can be read in the detected area that can then be used for the file name.
-
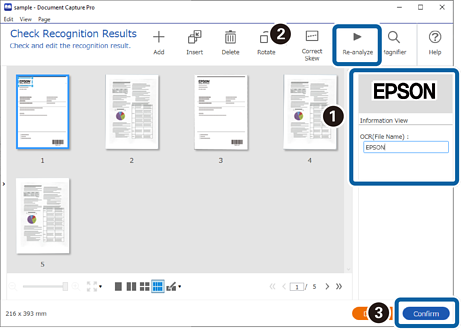
If you want to check if the text has been recognized correctly, select Show the detection result. You can check the recognized area and text on the screen displayed after scanning. You can also re-specify the area to be recognized, or correct the text.
-
-
12Select OCR from File Name Components.
 Note:
Note:You can use your cursor to specify where you want to add File Name Components.
You can also change the order of components by selecting added items and dragging/dropping them.
If you want to delete a component, select the added item and delete it using the Delete key on your keyboard.
