Creating a User-defined Index
-
Some items and settings may not be available depending on the scanner you are using.
-
Purchasing a DCP Enhanced OCR license allows you to create user-defined indexes on multifunction devices that support DCP Enhanced OCR.
See the following for more information on DCP Enhanced OCR.
You can set a user-defined index based on barcodes, OCR, or the MRZ in passports and travel documents, and output it as index data.
-
1Display the Job Settings screen, and then click the 3. Index tab.
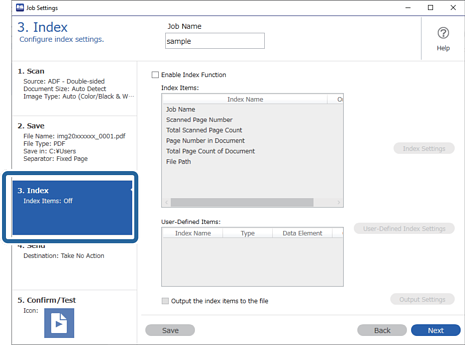
-
2Select Enable Index Function.
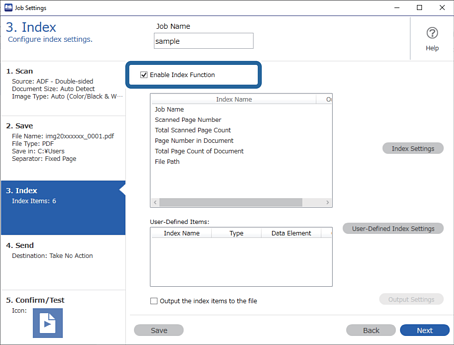
-
3Click User-Defined Index Settings.
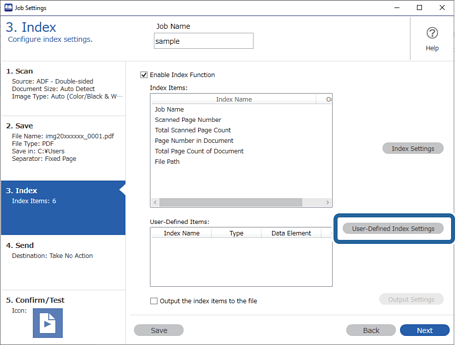
-
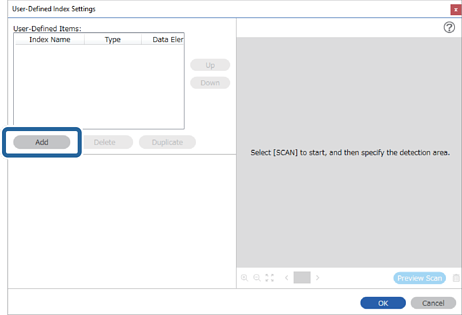
4Click Add on the User-Defined Index Settings screen.
-
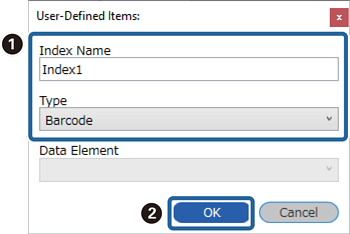
5On the screen displayed, set the name and the format type for the user-defined index, and then click OK.
 Note:
Note:If you have selected Passport or Official Travel Document (TD1) as the Type, select the elements you want to output in Data Element.
-
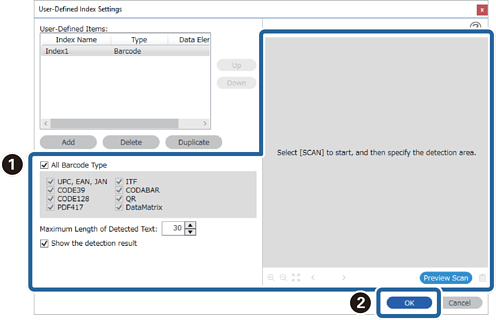
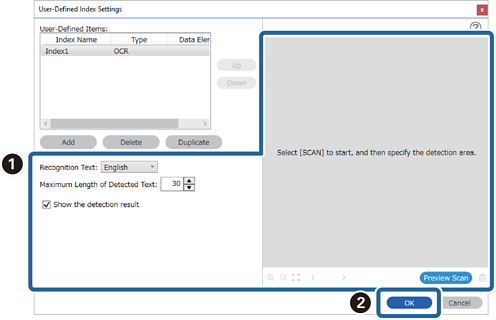
6Set the index information details, and then click OK.
<When creating a user-defined index using a barcode>
<When creating a user-defined index using OCR>
<When creating a user-defined index using the MRZ in a passport or travel document>
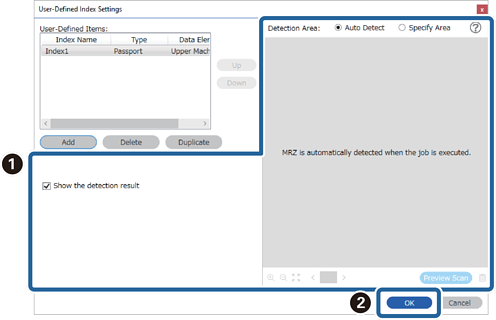 Note:
Note:To set the detection area manually, select Specify Area to drag on the preview screen to specify the MRZ detection area.
-
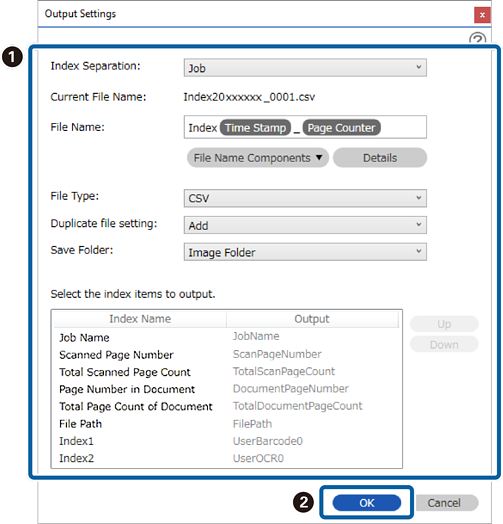
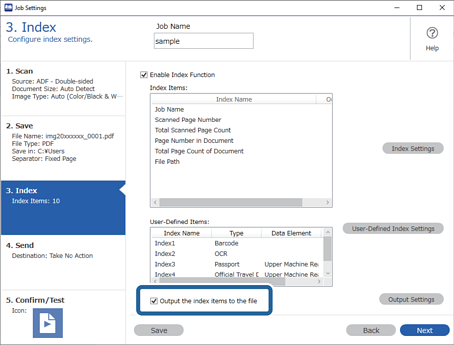
7Select Output the index items to the file.
-
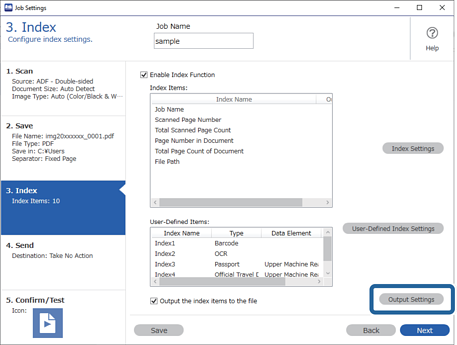
8Click Output Settings.
-
9Set the output items and file name you want to use when outputting the index items to a file, and then click OK.