
Check the following before scanning.
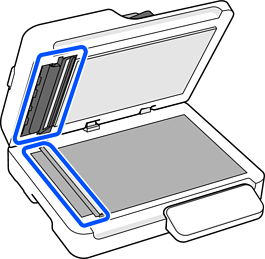
Make sure there are no originals on the scanner glass.
Make sure there is no dust or dirt in the areas indicated in the following illustration.
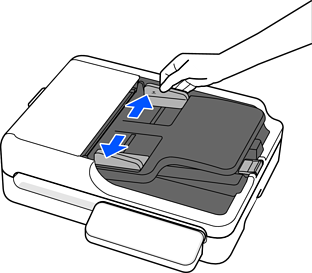
Slide the edge guides on the input tray all the way out.
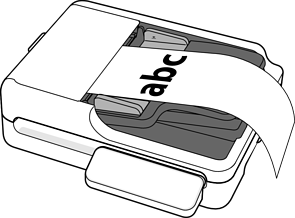
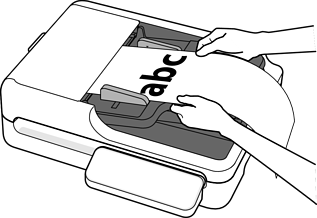
Load the original into the input tray straight, facing up and with the top edge facing into the ADF.

Slide the original into the ADF until it meets resistance.
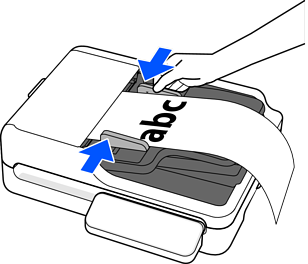
Adjust the edge guides to fit the original without any gap. Otherwise, the originals may be fed skewed.
Support long paper at the input side so that it does not drop out of the ADF, and on the output side so that the ejected paper does not fall from the output tray.
When scanning, set the Document Size according to the length of the original.
When scanning from a computer or using the Computer feature on the control panel
Select Customize from Document Size and set the length of the original. If the original is up to 3,048.0 mm (120 in.) long, you can scan it by setting Document Size to Auto Detect (Long Paper).
When using Document Capture Pro/Document Capture: Press the Detailed Settings button on the scan settings screen to open the Epson Scan 2 screen. In Main Settings, set Document Size to Auto Detect (Long Paper) or Customize.
When using Epson Scan 2: In Main Settings, set Document Size to Auto Detect (Long Paper) or Customize.
When using Network Folder/FTP, Email, Cloud, or USB Drive from the scanner's control panel
In Scan Settings, select User Defined from Original Size and set the size of the original.
You can also register user-defined sizes in Web Config.
You can use these registered user-defined sizes in Presets or User Default Settings in Web Config. In Scan Area, select User defined and click Get from User-Defined Paper Size List(Original) to load the settings.