Open the input tray, and then slide out the output tray.

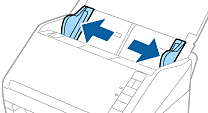
Do not extend the input tray extension and output tray extensions and do not raise the stopper.
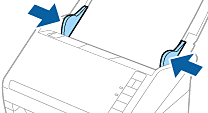
Slide the edge guides on the input tray all the way out.
Load the original straight into the input tray, facing down with the top edge facing into the ADF.
Slide the original into the ADF until it meets resistance.
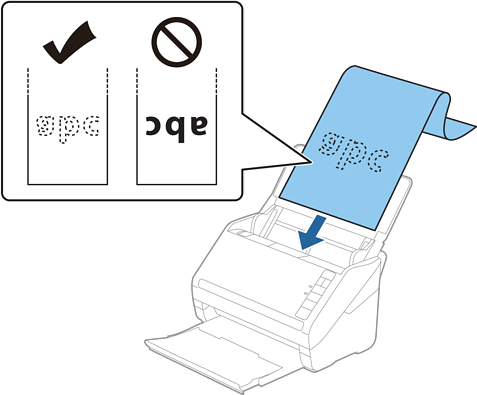
Adjust the edge guides to fit the edge of the long paper making sure there are no gaps between the edge of the paper and the edge guides. Otherwise, the originals may be fed skewed.
The following shows the maximum lengths according to the scanning resolution.
· 50 to 200 dpi: 6,096.0 mm ( 240.0 in.)
· 201 to 300 dpi: 5,461.0 mm ( 215.0 in.)
· 301 to 600 dpi: 1,346.0 mm ( 53.0 in.)
You need to specify the paper size in the Epson Scan 2 window.
When you are using Document Capture Pro, you can open the Epson Scan 2 window by pressing the Detailed Settings button on the Scan Settings screen.
There are three ways to specify the paper size in Epson Scan 2, if the paper length is 3,048 mm (120 inches) or less, you can select Auto Detect (Long Paper) to detect the size automatically.
If the paper length is more than 3,048 mm (120 inches), you need to select Customize and enter the size of the paper. If the paper length is 5,461 mm (215 inches) or less, you can use Detect paper length instead of entering the paper height. If the paper is longer than 5,461 mm (215 inches), you need to enter both width and height size of the paper.
To guarantee scanning quality, the scanning speed for long paper is slowed down automatically.
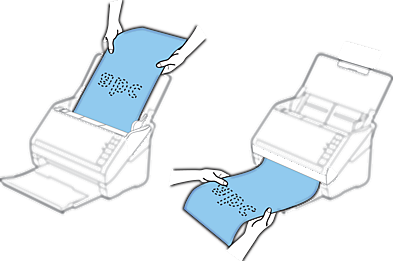
Support the long paper at the input side so that it does not drop out of the ADF, and the output side so that the ejected paper does not fall from the output tray.