
The roller assembly kit (the pickup roller and the separation roller) needs to be replaced when the number of scans exceeds the life cycle of the rollers. When a replacement message is displayed on the control panel or your computer screen, follow the steps below to replace the kit.

A: Pickup Roller, B: Separation roller
Replace the roller assembly kit while the scanner is turned on.
Open the ADF cover.
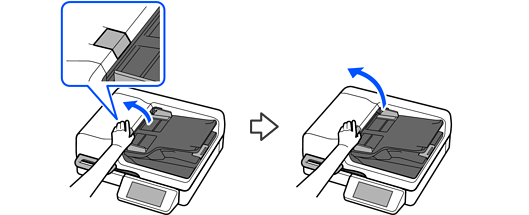
Remove the pickup roller cover.
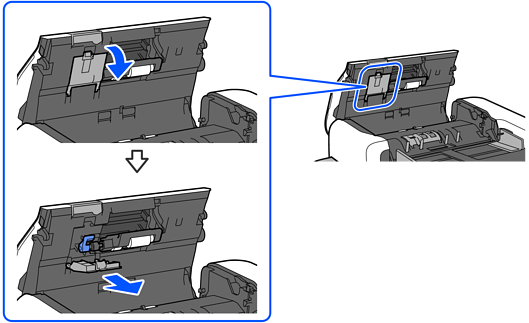
Remove the pickup roller.
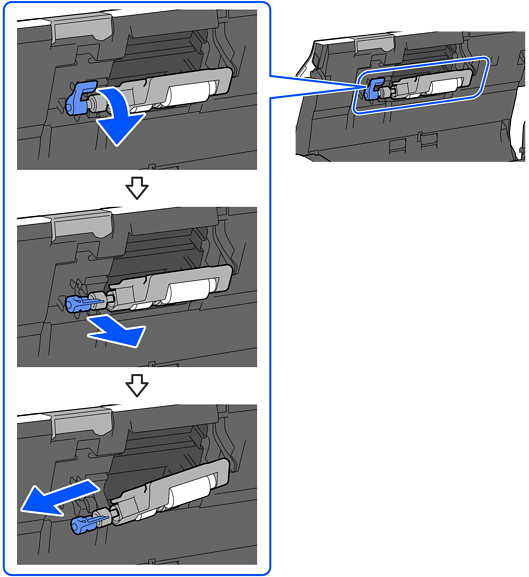
Do not pull out the pickup roller forcibly. This could damage the inside of the scanner.
Install the new pickup roller.
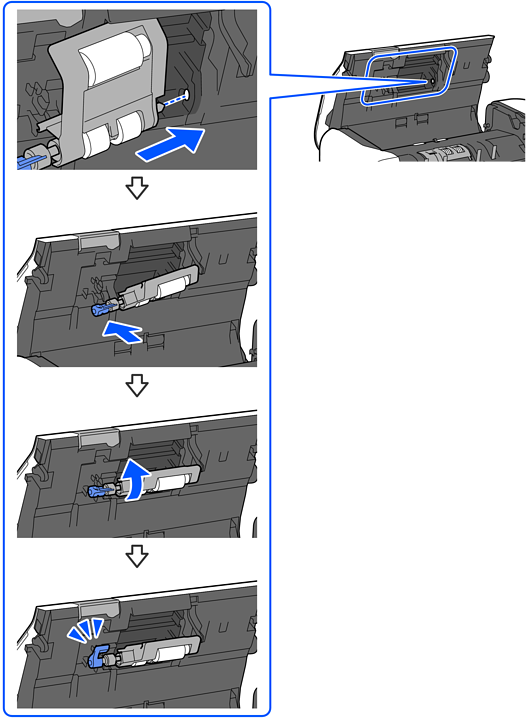
Do not touch the surface of the roller with your fingers.
Reinstall the pickup roller cover.
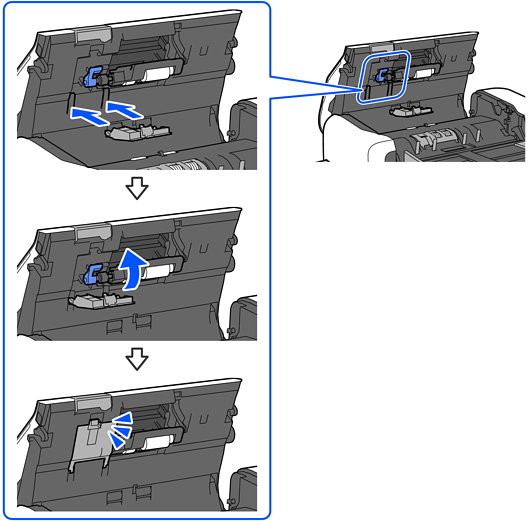
Make sure the cover is closed correctly.
Make sure the cover hinges are not protruding and the cover is closed correctly.
If the cover is hard to close, make sure the pickup roller is installed correctly.
Remove the separation roller cover.
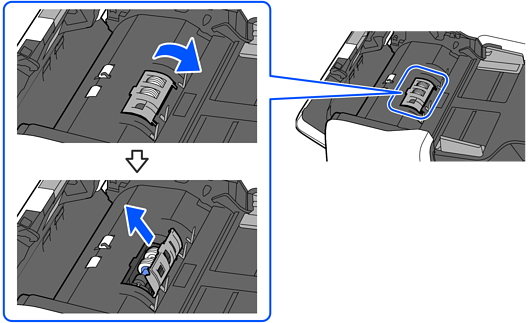
Remove the separation roller.
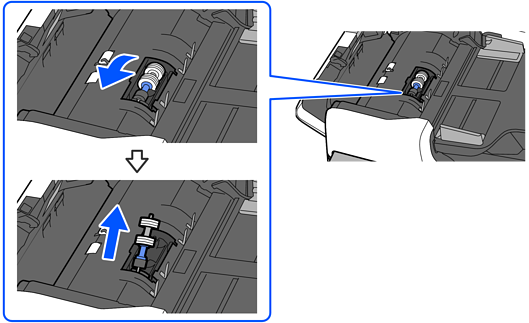
When picking up the separation roller, hold the sides of the roller and lift it up.
Install the new separation roller.
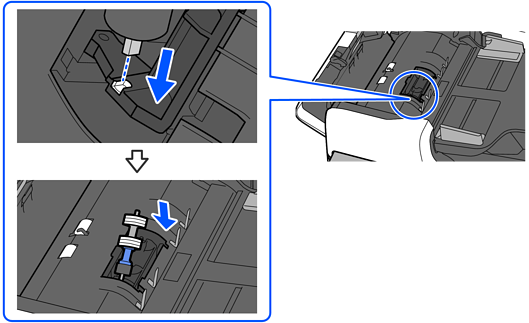
When installing the separation roller, hold the sides of the roller. Do not touch the surface of the roller with your fingers.
Reinstall the separation roller cover.
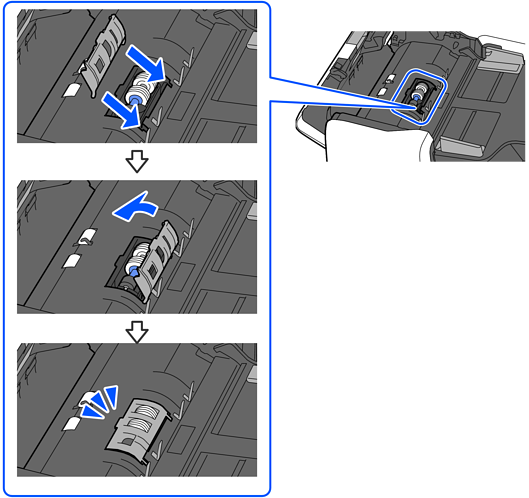
If the cover is hard to close, make sure the separation rollers are installed correctly, and that the protruding parts are aligned.
Close the ADF cover.

Reset the number of scans using the control panel or the Epson Scan 2 Utility.
Dispose of the pickup roller and the separation roller following the rules and regulations of your local authority. Do not disassemble them.