
You can register frequently used scanning setting as Presets. You can register up to 48 presets.
You can register the current settings by selecting  on the start scanning screen.
You can also register Presets in Web Config.
Select the Scan tab > Presets.
If you select Scan to Computer when registering, you can register the job created in Document Capture Pro as Presets. This is available only for computers connected over a network. Register the job in Document Capture Pro in advance.
If the Lock Setting on the control panel is enabled, only the administrator can register Presets.
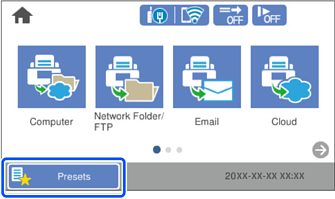
Select Presets on the home screen on the scanner's control panel.
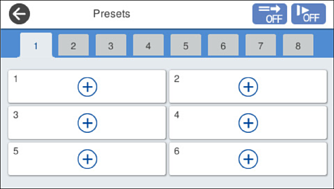
Select  .
.
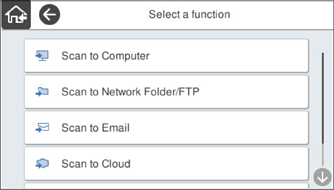
Select the menu you want to use to register a preset.
Set each item, and then select  .
.
When you select Scan to Computer, select the computer on which Document Capture Pro is installed, and then select a registered job. This is available only for computers connected over a network.
Make the preset settings.
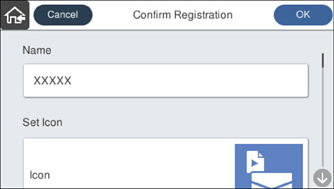
Select OK.