
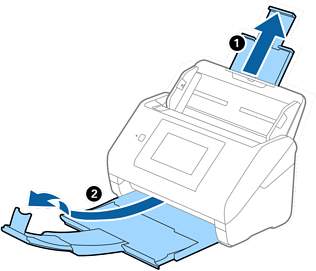
Extend the input tray extension. Slide out the output tray, extend the output tray extension, and then raise the stopper.
For A4 size or larger originals, make sure you pull out and extend the input tray extension.
Make sure you pull out and extend the output tray extensions so that they are a little bit longer than the length of the original, and raise the stopper so that the ejected originals can be stacked comfortably on the output tray.
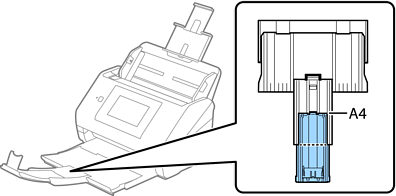
When loading A4 size originals, extend the output tray as shown in the following image.
The stopper can move forward and backward on the output tray extension so that you can easily adjust the stopper position to the best position for the originals being scanned.
If thick originals bump into the output tray and fall from it, store the output tray and do not use it to stack the ejected originals.
If scanned images are still affected by ejected originals hitting the surface below the scanner, we recommend placing the scanner on the edge of a table where the ejected originals can drop freely and you can catch them.
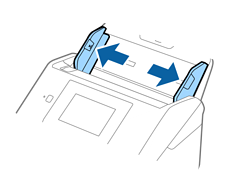
Slide the edge guides on the input tray all the way out.
Fan the originals.
Hold both ends of the originals and fan them a few times.
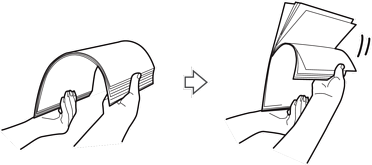
Align the edges of the originals with the printed side facing down and slide the leading edge into a wedge shape.

Load the originals into the input tray facing down with the top edge facing into the ADF.
Slide the originals into the ADF until they meet resistance.

Slide the edge guides to fit the edge of the originals making sure there are no gaps between the originals and the edge guides. Otherwise, the originals may be fed skewed.

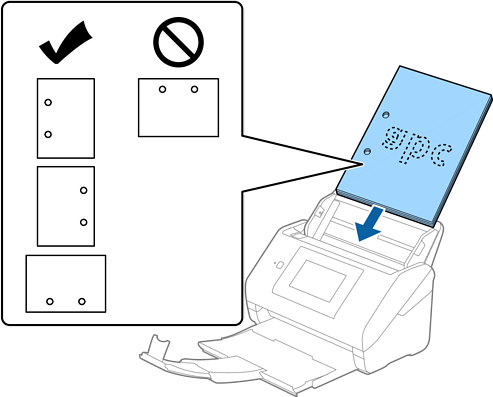
When scanning originals with punch holes such as loose leaf paper, load the originals with the holes facing to the side or facing down. There must not be any holes within a 30 mm (1.2 inches) strip at the center of the originals. However, there can be holes within 30 mm (1.2 inches) from the leading edge of the originals. Make sure that the edges of the punch holes do not have burrs or curls.
When scanning thin paper with crinkles that are causing paper jams or double feeds, you may be able to improve the situation by enabling Slow. To do this, select Settings > Scanner Settings > Slow on the control panel and set it to On to slow down the feeding speed.