
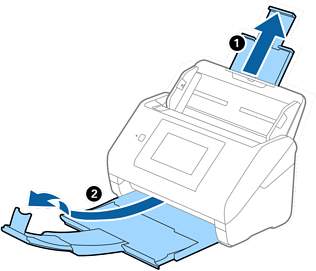
Extend the input tray extension. Slide out the output tray, extend the output tray extension, and then raise the stopper.
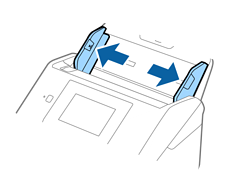
Slide the edge guides on the input tray all the way out.
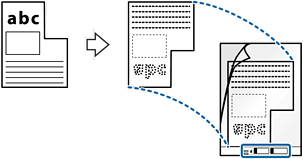
Place the Carrier Sheet with the illustration on the front edge facing up and place the original in the center of the Carrier Sheet with the side to be scanned facing down.
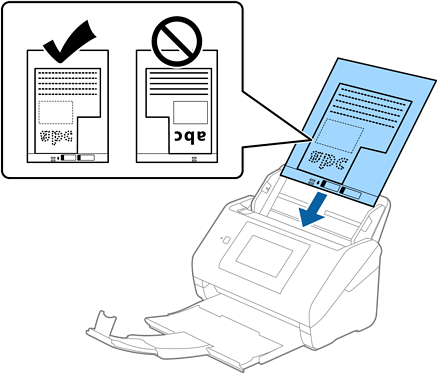
Load the Carrier Sheet into the input tray with the top edge facing into the ADF.
Slide the Carrier Sheet into the ADF until it meets resistance.
Slide the edge guides to fit the edge of the Carrier Sheet making sure there are no gaps between the Carrier Sheet and the edge guides. Otherwise, the carrier sheet may be fed skewed.

You may need to stop using a Carrier Sheet that is scratched or has been scanned more than 3,000 times.
If you cannot find an appropriate size for the original you want to scan in the Document Size list, select Auto Detect.
When using Epson Scan 2, you can also select Customize to create a custom document size.
When scanning a Carrier Sheet by selecting Auto Detect as the Document Size setting, the image is automatically scanned by applying Paper Skew in the Correct Document Skew setting.
Only use the Carrier Sheet designed for your scanner. The Carrier Sheet is automatically recognized by the scanner by detecting two small rectangular holes on the front edge. Keep the holes clean and not covered.
