
There are two ways you can send scanned images to a specified email address. See the following for more information on the two methods.
You need to make settings in advance to perform scanning. See the following link for details on the work flow for making settings.
Scan to Email Feature Work Flow
The following explains how to scan using an email server.
Before scanning, make sure the scanner’s Date/Time and Time Difference settings are correct.
If you need to make changes, select Settings > Basic Settings > Date/Time Settings on the control panel.
Place the original.
Example: For standard paper
Select Email on the home screen on the control panel.
Specify the destination.
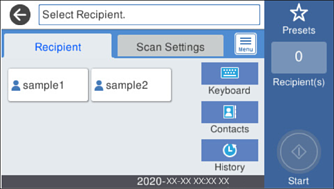
The number of recipients you selected is displayed on the right of the screen. You can send emails to up to 10 addresses and groups.
If groups are included in recipients, you can select up to 200 individual addresses in total, taking addresses in the groups into account.
Select the address box at the top of the screen to display the list of selected addresses.
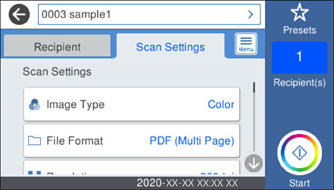
Select Scan Settings, check settings such as the save format, and then change them if necessary.
Scan Menu Options for Scanning to an Email
Select  to save your settings as a preset.
Select  , check the Scanner Settings, and then change them if necessary.
You can change the settings such as Slow or DFDS Function.
Tap  .
.
The scanned image is sent to the recipient's email address.
After scanning, you may be prompted to save the settings as the User Settings.