Use a Carrier Sheet when scanning the following types of originals.
Photos
Valuable originals
Wrinkled originals
Fragile originals
Make sure there is enough space in front of the scanner for the ejected originals.
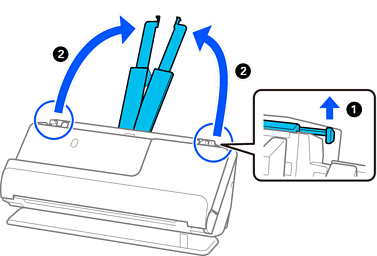
Make sure that the scanner position icon is  (straight path position).
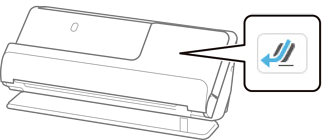
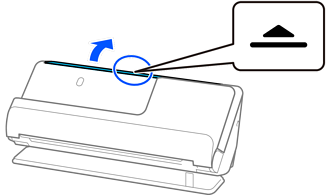
If  (vertical path position) is displayed, pull the scanner position selector to tilt the scanner back.
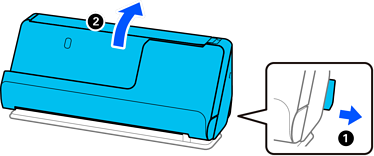
Open the input tray.
Raise the input tray extension.
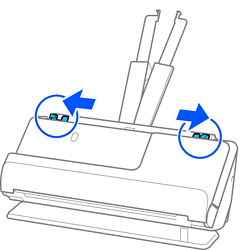
Move the edge guides to the edges of the input tray.
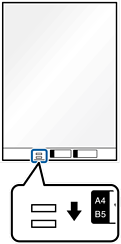
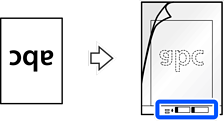
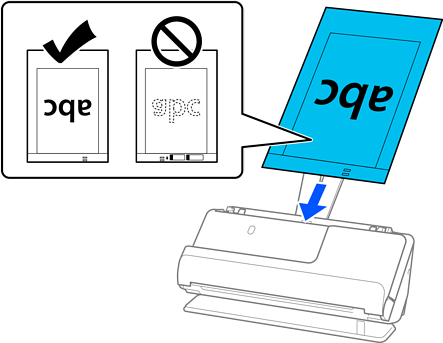
Place your original in the Carrier Sheet.
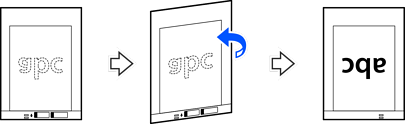
Place your original so that the back of the original is facing the side of the Carrier Sheet with the illustration.
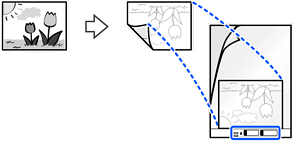
For large originals, fold them in half so that the side to be scanned is facing out, and then place the original with side "2" facing the side with the illustration and at the leading edge of the Carrier Sheet.
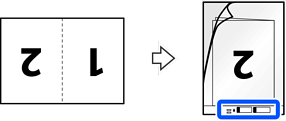
Turn over the Carrier Sheet.
Load the Carrier Sheet into the input tray with the top edge facing into the ADF.
Insert the paper into the ADF until it meets resistance.
Align the edge guides with the Carrier Sheet so that there are no gaps. Otherwise, the Carrier Sheet may be fed skewed.
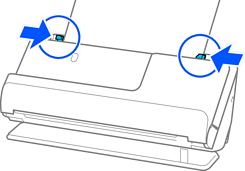
If the edge guides are too far apart or too tight, the original may not be fed correctly. The edge guides should be aligned so that they lightly touch the edges of the original.
Do not use a scratched Carrier Sheet or a Carrier Sheet that has been scanned more than 3,000 times.
If you cannot find an appropriate size for the original you want to scan in the Original Size list, select Auto Detect.
When scanning with a Carrier Sheet, select Auto Detect as the Document Size to automatically scan the image while applying Paper Skew as the Correct Document Skew setting.
The leading edge of the original must be placed at the binding part of the Carrier Sheet when scanning an original approximately 297 mm (11.7 inches) long. Otherwise, the entire length of the Carrier Sheet may be scanned when Auto Detect is selected as the Document Size.
When scanning a large original, to scan both sizes and stitch them together, make the appropriate settings on the Epson Scan 2 screen.
When you are using Epson ScanSmart, you can open the Epson Scan 2 screen by clicking the Settings button > Scanner Settings tab > Scan Settings.
Select Double-Sided from Scanning Side and select Left & Right from Stitch Images in the Epson Scan 2 window. See the Epson Scan 2 help for details.
Only use a Carrier Sheet designed for your scanner. The Carrier Sheet is automatically recognized by the scanner by detecting two small rectangular holes on the leading edge. Keep the holes clean and not covered.