
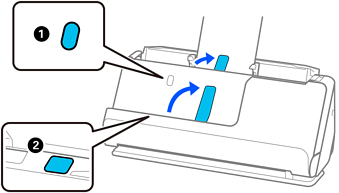
Make sure that the scanner position icon is  (vertical path position).
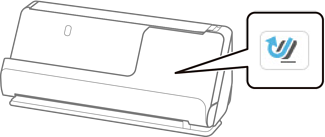
If  (straight path position) is displayed, pull the scanner position selector to tilt the scanner forward.
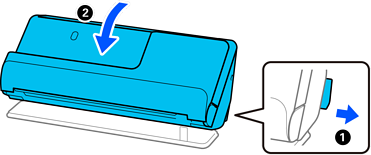
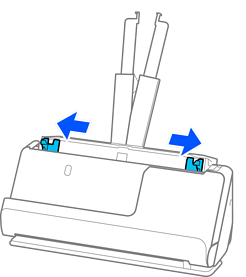
Open the input tray.
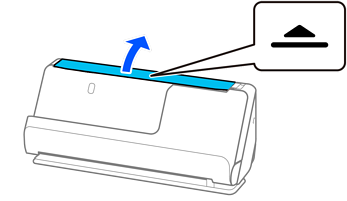
Raise the input tray extension.
Move the edge guides to the edges of the input tray.
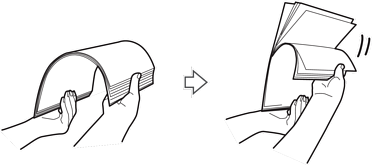
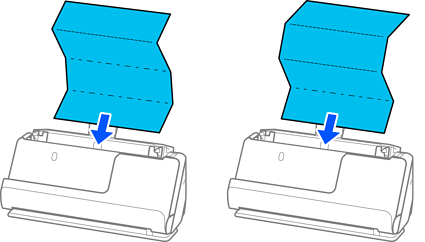
Fan the originals.
Hold both ends of the originals and fan them a few times.
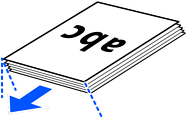
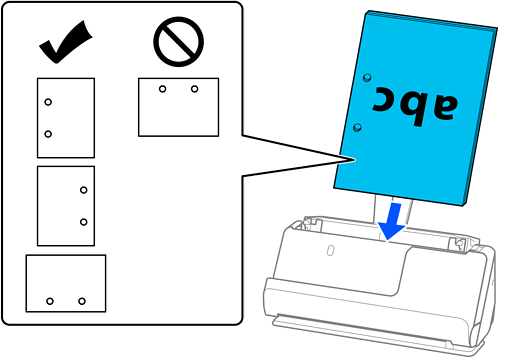
Align the edges of the originals, and with the side to be scanned facing up, slide the leading edges into a wedge shape.
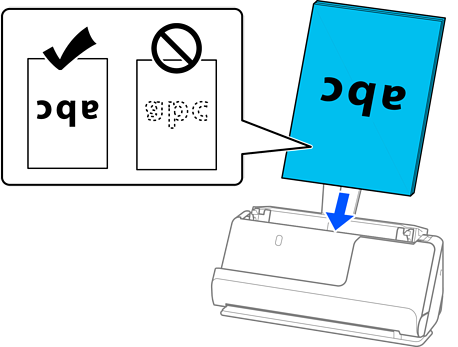
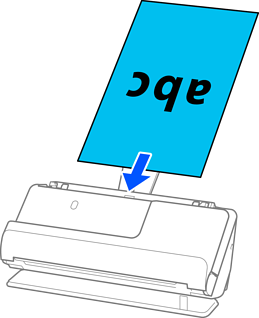
Place the originals into the ADF input tray facing up and with the top edge facing into the ADF.
Insert the paper into the ADF until it meets resistance.
 is displayed, the scanner is in the straight path position.If
is displayed, pull the lever on the back to tilt the scanner back.
is displayed, the scanner is in the straight path position.If
is displayed, pull the lever on the back to tilt the scanner back.
Adjust the edge guides to fit the edges of the original so that there are no gaps. Otherwise, the original may be fed skewed.
If the edge guides are too far apart or too tight, the original may not be fed correctly. The edge guides should be aligned so that they lightly touch the edges of the original.
If the document extends beyond the input tray extension, support the document with one hand to prevent it from falling from the ADF. Also, while scanning an original, support both ends of the original with your hands to prevent it from tilting.
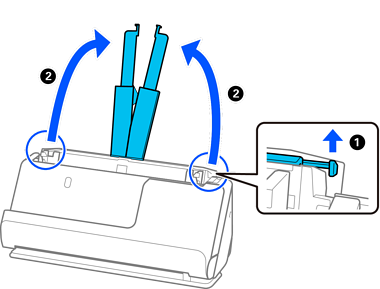
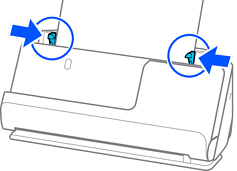
When scanning thin paper originals such as flyers or receipts, or when scanning originals that tend to curl after scanning, we recommend extending the paper output support in both places.
After loading the original, press the buttons (two places) to raise the paper output support.
When scanning originals such as business cards that tend to curl after scanning, we recommend scanning in the straight path position and only loading one original at a time.
if you cancel scanning in the middle of scanning a batch of originals, the second original will be fed a little bit into the ADF and then scanning stops. Open the scanner cover to remove it, and then load the page again together with the first page and the rest of the originals.
Depending on the type of paper and the environment in which the scanner is being used, the original may fall from the front of the scanner after scanning. In this situation, load fewer originals into the scanner than the specified number of originals that can be loaded.