
Select Maintenance on the home screen.
To select an item, use the 


 buttons, and then press the OK button.
Select Fill Ink.
Press the button to read all the safety and usage precautions for filling ink, and then press the OK button to continue.
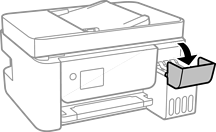
Open the ink tank cover.
Open the ink tank cap.
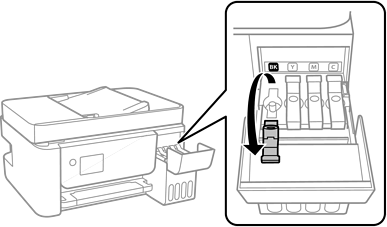
Make sure that the color of the ink tank matches the ink color that you want to refill.
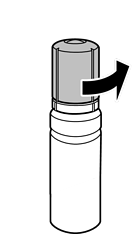
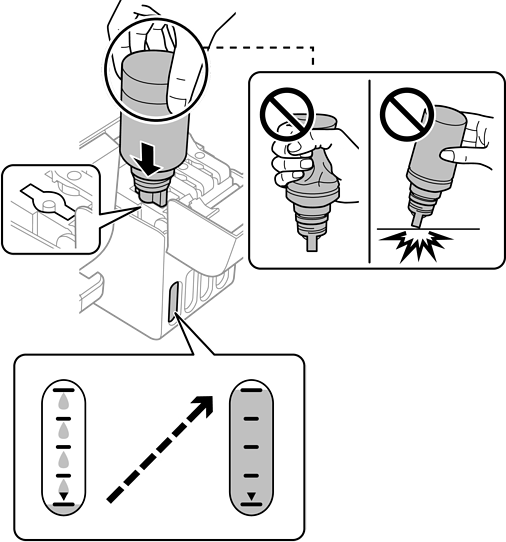
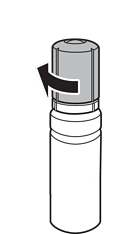
While holding the ink bottle upright, turn the cap slowly to remove it.
Epson recommends the use of genuine Epson ink bottles.
Be careful not to spill any ink.
Check the upper line (a) in the ink tank.
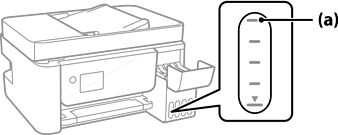
Align the top of the ink bottle with the filling port, and then insert it straight into the port to fill ink until it stops automatically at the upper line.
When you insert the ink bottle into the filling port for the correct color, ink starts pouring and the flow stops automatically when the ink reaches the upper line.
If the ink does not start flowing into the tank, remove the ink bottle and reinsert it. However, do not remove and reinsert the ink bottle when the ink has reached the upper line; otherwise ink may leak.
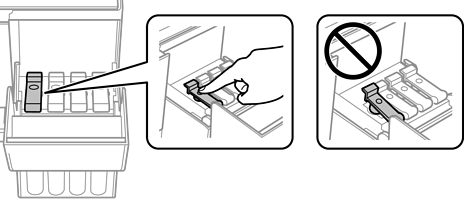
When you have finished filling the ink, remove the ink bottle.
Do not leave the ink bottle inserted; otherwise the bottle may be damaged or ink may leak.
If any ink remains in the ink bottle, tighten the cap and store the bottle upright for later use.
Close the ink tank cap securely.
Close the ink tank cover firmly.
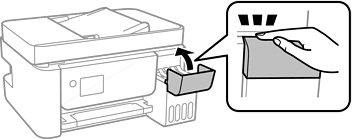
Press the  button, and then follow the on-screen instructions to set the ink level.
Even if you do not refill ink up to the upper line on the ink tank, you can continue using the printer. To keep your printer operating at its best, however, fill ink tank up to the upper line and reset the ink level immediately.