
Load A4-size plain paper in the printer.
Select Maintenance on the home screen.
To select an item, use the


 buttons, and then press the
OK button.
buttons, and then press the
OK button.
Select Nozzle Check.
Follow the on-screen instructions to print the nozzle check pattern.
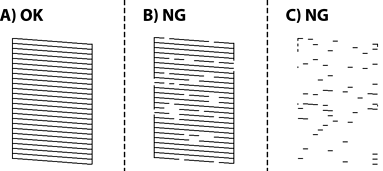
Check the printed pattern to see if the print head nozzles are clogged.
If print quality has not improved after repeating nozzle check and head cleaning 3 times, wait for at least 6 hours without printing, and then run the nozzle check again and repeat the head cleaning if necessary. We recommend turning off the printer by using the  button. If print quality has still not improved, run Power Cleaning.