
To print by increasing black density, use black enhance overcoat in the printer driver. This feature overcoats light gray ink on the dark parts of printouts to increase the maximum density of black and to increase the dynamic range.
Black enhance overcoat is only available for glossy paper. Note that it is not available for all types of glossy paper.
Image effects for black enhance overcoat

Enabling black enhance overcoat increases black density, and disabling it increases print speed.
When using applications featuring a color management function, specify how to adjust colors from these applications.
When using applications without a color management function, start from step 2.
Depending on the type of the application, make the settings following the table below.
|
Application |
Color Management Settings |
|---|---|
|
Adobe Photoshop CS3 or later Adobe Photoshop Lightroom 1 or later Adobe Photoshop Elements 6 or later |
Printer Manages Colors |
|
Other applications |
No Color Management |
For information on the operating systems supported by each application, visit the distributor’s website.
Setting example for Adobe Photoshop Elements 2020
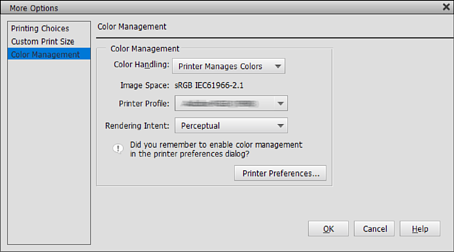
Click More Options on the print screen.
Select Color Management, and them select Printer Manages Colors from Color Handling. Click Printer Preferences.
Make sure that Black Enhance Overcoat is selected as the Level on the printer driver's Main tab.
Black Enhance Overcoat is automatically enabled when anything other than Standard is selected as the Level.
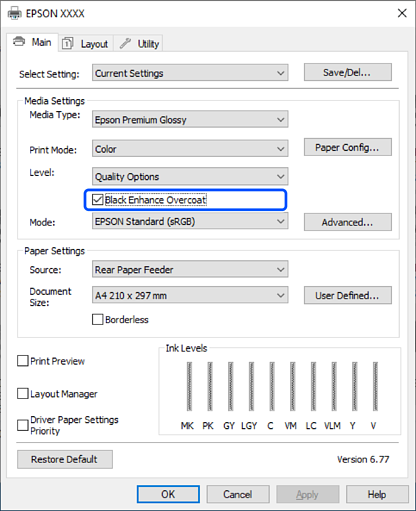
If you want to further increase black density, select Max Quality (Carbon Black) as the Level.
Check other settings, and then start printing.