
The printer driver for this printer comes with the Epson proprietary function PhotoEnhance that makes the most efficient use of the color reproduction area, corrects image data to improve colors before printing.
By using PhotoEnhance, you can correct photo colors to match the subject types such as people, scenery, or night view. You can print color data in sepia or black and white. Colors are automatically corrected simply by selecting the print mode.
It is recommended that you use images with a color space of sRGB.
When using applications featuring a color management function, specify how to adjust colors from these applications.
When using applications without a color management function, start from step 2.
Depending on the type of the application, make the settings following the table below.
|
Application |
Color Management Settings |
|---|---|
|
Adobe Photoshop CS3 or later Adobe Photoshop Lightroom 1 or later Adobe Photoshop Elements 6 or later |
Printer Manages Colors |
|
Other applications |
No Color Management |
For information on the operating systems supported by each application, visit the distributor’s website.
Setting example for Adobe Photoshop Elements 2020
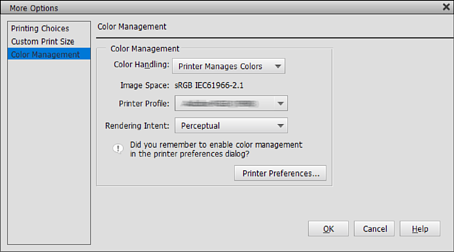
Click More Options on the print screen.
Select Color Management, and then select Printer Manages Colors from Color Handling. Click Printer Preferences.
Display the Main tab in the printer driver, select PhotoEnhance for Mode, and click Advanced.
On the PhotoEnhance screen, you can set effects to apply to the print data.
See the printer driver help for more details on each item.
Check other settings, and then start printing.