When you need to store the printer or transport it when moving or for repairs, follow the steps below to pack the printer.
When carrying the printer, lift it using a stable position. Lifting the printer using an unstable position may result in injury.
Because this printer is heavy, it should always be carried by two or more people when unpacking and transporting.
When lifting the printer, two or more people should assume the correct positions as shown below. Uninstall the optional paper cassette unit if it is installed. If you lift the printer holding other positions, the printer may fall or you may trap your fingers when placing the printer.
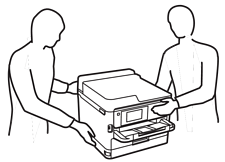
When carrying the printer, do not tilt it more than 10 degrees; otherwise the printer may fall.
Be careful not to trap your hand or fingers when opening or closing the scanner unit. Otherwise you may be injured.
When storing or transporting the printer, avoid tilting it, placing it vertically, or turning it upside down; otherwise ink may leak.
Leave the ink supply unit installed. Removing the ink supply unit can dry out the print head and may prevent the printer from printing.
Turn off the printer by pressing the  button.
Make sure the power light turns off, and then unplug the power cord.
Unplug the power cord when the power light is off. Otherwise, the print head does not return to the home position causing the ink to dry, and printing may become impossible.
Disconnect all cables such as the power cord and USB cable.
If the printer supports external storage devices, make sure they are not connected.
Remove all of the paper from the printer.
Make sure there are no originals on the printer.
Open the scanner unit with the document cover closed. Secure the print head to the case with tape.
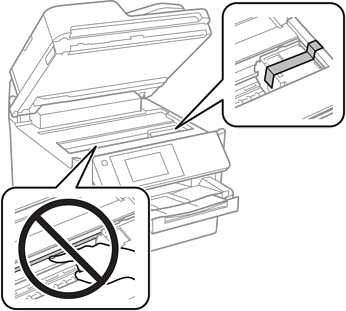
Close the scanner unit.
Open the ink cover.
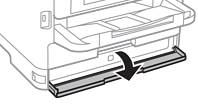
If the ink cover is locked, you cannot open it. Release the cover lock.
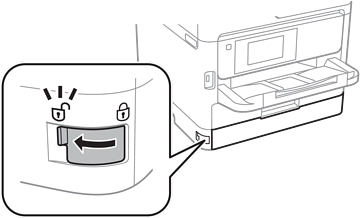
Secure the ink tray by attaching the supplied protective material with tape so that the tray can not open.

Close the ink cover.
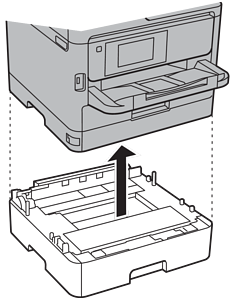
Uninstall the optional paper cassette unit if it is installed.
Prepare to pack the printer as shown below.
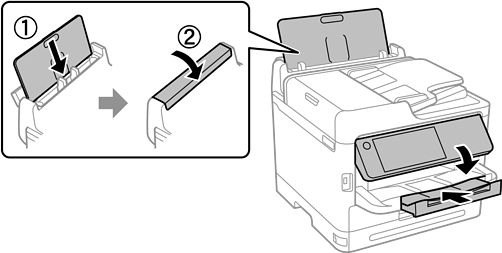
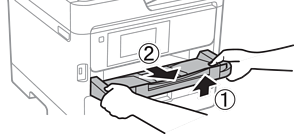
Remove the output tray from the printer.
Pack the printer in its box, using the protective materials.
When you use the printer again, make sure you remove the tape securing the print head and the protective material attached on the ink tray. If print quality has declined the next time you print, clean and align the print head.