
Prepare the print data before loading the disc.
Before printing on the disc, see the disc handling precautions.
Do not insert the disc tray while the printer is operating. Doing so may damage the printer.
Do not insert the disc tray until you send the print data and the  light turns on. Otherwise, an error will occur and the tray is ejected.
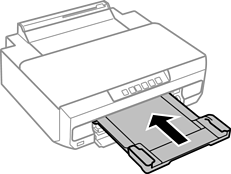
When the output tray is ejected, check that there is no paper on the tray, and then close it by pushing it with your hand.
Send print data from the computer.
Make sure you select Disc Tray as the Paper Source in print settings.
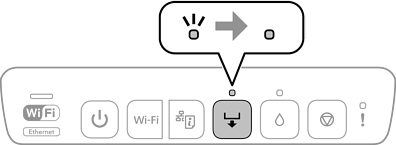
Wait until the
light on the control panel changes from flashing to lit.
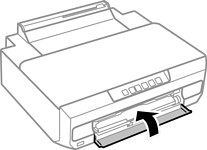
Close the front cover.
Remove the disc tray stored under the output tray.
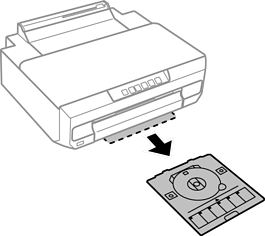
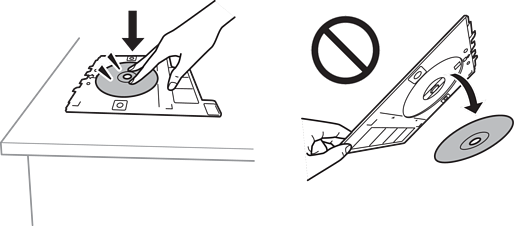
Place a disc on the disc tray with the printable side facing up.
Press the center of the disc to secure it on the disc tray. Turn over the tray to check that the disc does not fall out and is firmly secured in the disc tray.
Insert the disc tray into the gap above the output tray. Align the line on the disc tray under the EPSON logo on the printer.
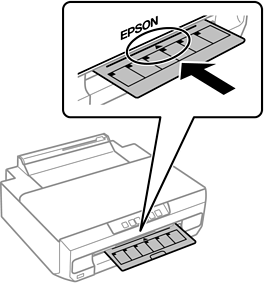
You may feel slight friction when inserting the tray into the printer. This is normal and you should continue to insert it horizontally.
Press the
button.
The disc tray is pulled in and printing starts.
Remove the disc tray when it is ejected automatically after printing, and then remove the disc from the tray.
Insert the disc tray back into the slot under the output tray.
After printing is finished, make sure you remove the disc tray. If you do not remove the disc tray and turn the printer on or off, or run head cleaning, the tray will strike the print head and may cause the printer to malfunction.