
You can save scanned images to smart devices such as smart phones or tablets.
Before scanning, install Epson iPrint on your smart device.
Epson iPrint screens are subject to change without notice.
Epson iPrint contents may vary depending on the product.
Place the originals.
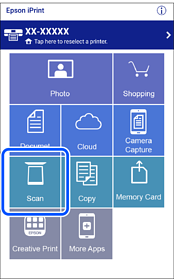
Start Epson iPrint.
Tap Scan.
Set the scan settings. Tap the  icon at the top-right of the screen.

Set the items as necessary.

When you have finished making settings, tap Done.
Tap Scan.

Scanning starts.
Check the scanned image, and then select the saving method.

 : Displays the screen where you can save the scanned images.
 : Displays the screen where you can send scanned images by email.
 : Displays the screen where you can print scanned images.
Finally, follow the on-screen instructions.