Scanning Using Epson Scan 2
You can scan using the scanner driver "Epson Scan 2". You can scan originals using detailed settings that are suitable for text documents.
See the Epson Scan 2 help for an explanation of each setting item.
-
Place the original.
Note:If you want to scan multiple originals, place them in the ADF.
-
Start Epson Scan 2.
-
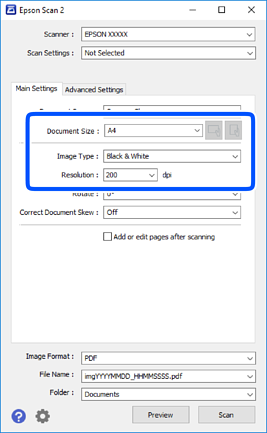
Make the following settings on the Main Settings tab.
-
Document Source: Select the source where the original is placed.
-
Document Size: Select the size of the original you placed.
-
 /
/  (Original orientation) buttons: Select the set orientation of the original you placed. Depending on the size of the original, this item may be set automatically and cannot be changed.
-
Image Type: Select the color for saving the scanned image.
-
Resolution: Select the resolution.
-
-
Make other scan settings if necessary.
-
You can preview the scanned image by clicking the Preview button. The preview window opens, and the previewed image is displayed.When you preview using the ADF, the original is ejected from the ADF. Place the ejected original again.
-
On the Advanced Settings tab, you can make detailed image adjustment settings that are suitable for text documents, such as the following.
-
Remove Background: Remove the background of the originals.
-
Text Enhancement: You can make blurred letters in the original clear and sharp.
-
Auto Area Segmentation: You can make letters clear and images smooth when performing black and white scanning for a document that contains images.
-
Color Enhance: You can enhance the color specified for the scanned image, and then save it in grayscale or black and white.
-
Threshold: You can adjust the border for monochrome binary (black and white).
-
Unsharp Mask: You can enhance and sharpen the outlines of the image.
-
Descreening: You can remove moiré patterns (web-like shadows) that appear when scanning printed papers such as a magazine.
-
Edge Fill: You can remove the shadow created around the scanned image.
-
Dual Image Output (Windows Only): You can scan once and save two images with different output settings at the same time.
-
Note:The items may not be available depending on other settings you made.
-
-
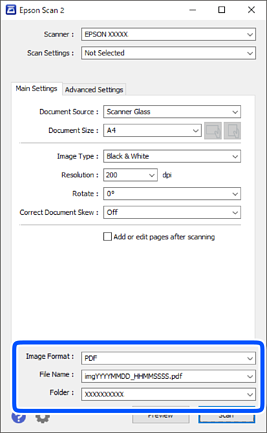
Set the file saving settings.
-
Image Format: Select the save format from the list.You can make detailed settings for each save format except BITMAP and PNG. Select Options from the list after selecting the save format.
-
File Name: Confirm the save file name displayed.You can change settings for the file name by selecting Settings from the list.
-
Folder: Select the save folder for the scanned image from the list.You can select another folder or create a new folder by selecting Select from the list.
-
-
Click Scan.
