Make sure you turn off the printer, unplug the power cord from the printer, and disconnect any cables before starting installation. Otherwise, the power cord may be damaged resulting in fire or electric shock.
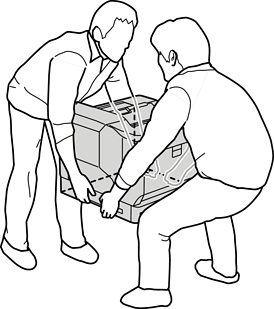
When lifting the printer, place your hands in the positions shown below. If you lift the printer holding other positions, the printer may fall or you may trap your fingers when placing the printer.
If you are using the printer stand, install it onto the lowest paper cassette unit in advance.
When installing the printer stand, make sure you lock the casters. Otherwise, the printer may move and cause an accident.
Place the paper cassette unit on a flat surface.
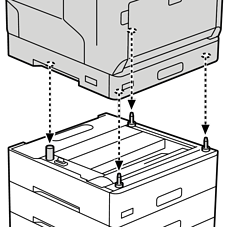
If you are also installing paper cassette units, place the second paper cassette unit onto the lowest paper cassette unit. Align each of the holes on the bottom with the guide pins.
See to steps 4 to 8 from the Related Information below.
Place the printer on the paper cassette unit.
Align each of the holes on the printer with the guide pins of the paper cassette unit, and then lower the printer until it resets securely on the units.
Remove the back cover of the standard paper cassette unit.
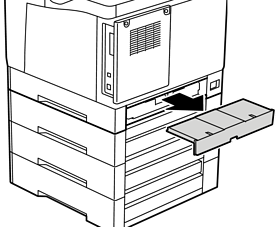
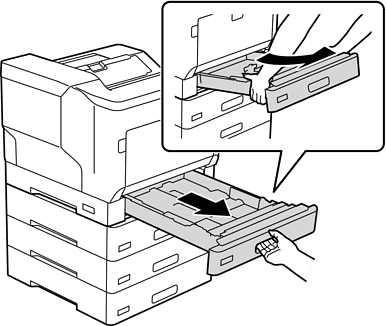
Pull out the paper cassette.
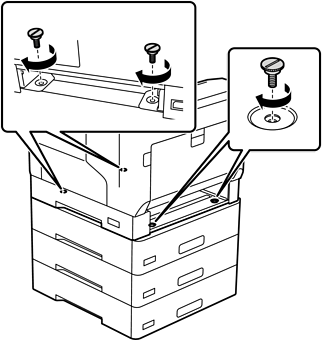
Fix the printer to the paper cassette units with four screws.
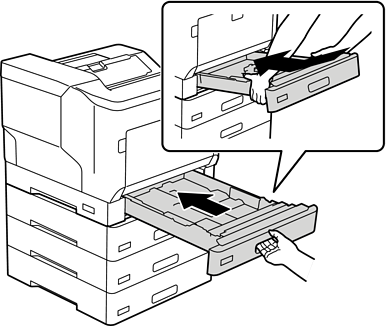
Reinsert the paper cassette.
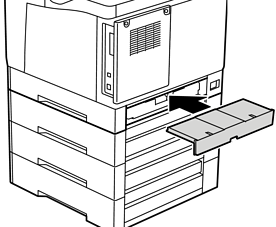
Reinstall the back cover removed.
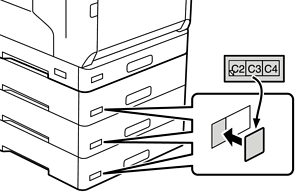
Affix the labels onto the front of the paper cassettes.
From top to bottom, affix the labels paper cassette 2 (C2), paper cassette 3 (C3), and paper cassette 4 (C4).
Reconnect the USB cable and power cord, and then turn on the printer.
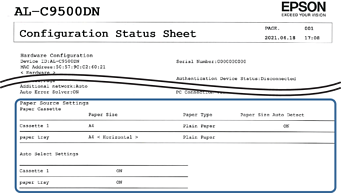
After installing the paper cassette units, print a Configuration Status Sheet to check if the optional items are installed correctly.