
Register the VoIP gateway you want to use to send and receive IP faxes.
Access Web Config, and then select Fax tab > IP-FAX Settings > VoIP Gateway Settings.
Click Registered VoIP Gateway > Edit.
The screen that shows the list of registered VoIP gateways is displayed.
Select the number that you want to register or edit, and then click Edit.
Set each item.
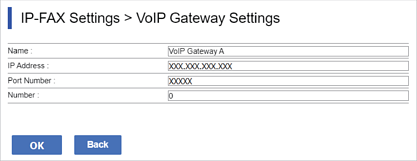
Click OK.
The settings are reflected on the printer.