
Wireless LAN Interface-P1 may not be available in your country or region.
The foldable sheet attached to the Wireless LAN Interface-P1 has the safety standard certification number on it and should not be removed.
Turn off the printer.
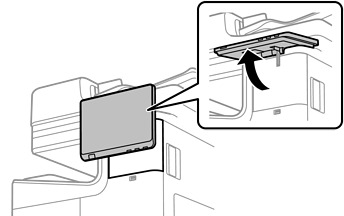
Open the control panel on the printer.
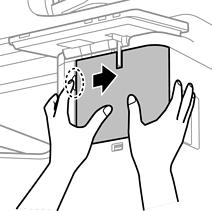
You need to install the Wireless LAN Interface-P1 inside the cover behind the control panel.
Slide the cover to the right to remove it.
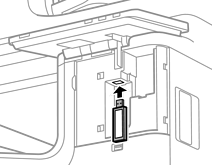
With the foldable sheet of the Wireless LAN Interface-P1 facing you, insert it firmly into the upper Wi-Fi unit port.
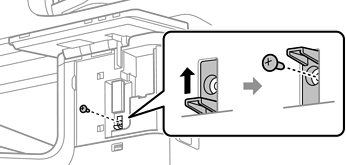
When locking the Wireless LAN Interface-P1, use a Phillips screwdriver to remove the lock lever screw, slide it upward, and then fix it with the screw.
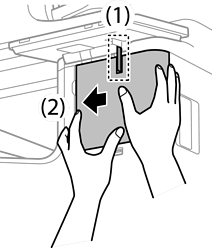
Align the cover removed in the previous step with the part (1) in the figure, and slide it in the direction of (2) to attach it.
Turn on the printer and check that  is displayed on the control panel.
If is not displayed, turn the printer off and then on again.