/
Scanning (Basic Operations) /
Performing a Job Scan
/
Scanning (Basic Operations) /
Performing a Job Scan
Performing a Job Scan
This section explains the workflow of scanning using an existing job.
-
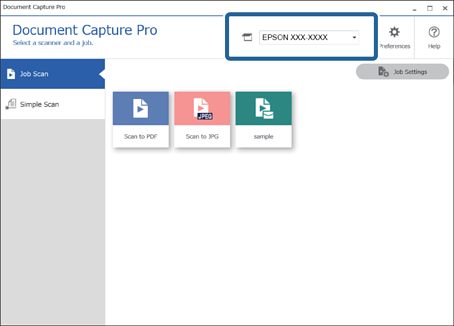
1Select the scanner you want to use from the Document Capture Pro top screen. When you start the software it automatically connects to the last scanner you used.
-
2Click the Job Scan tab, and then click the icon of the job you want to perform.
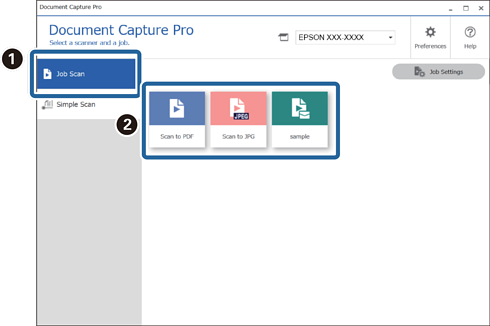
The selected job is performed.
When you perform a job for which Show the preview while scanning has been selected in the Scan Settings, a preview screen is displayed while scanning.
-
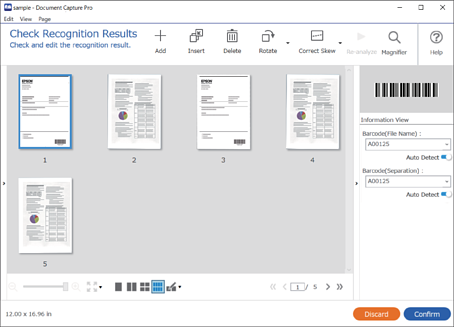
3If you execute a job that contains the following elements in the File Name Settings or Separation Settings from Save Settings, and the elements are detected in the scanned page, the detection area is displayed on the image as a marquee. Correct the recognition results manually if necessary, or change the area and run the recognition again.
-
OCR
-
Barcode
-
Form
-
-
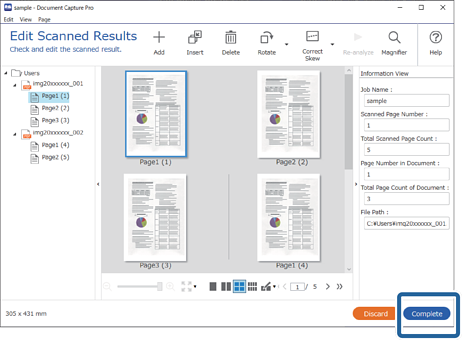
4For jobs for which Show Edit Page dialog before saving has been selected in the Scan Settings, check the scan results on the Edit Scanned Results screen after scanning, and then make edits as necessary.
You can check and edit the following on the Edit Scanned Results screen.
-
Results of separation
-
Scanned images
-
Index data

-
-
5Click Complete to finish performing the Job Scan.