
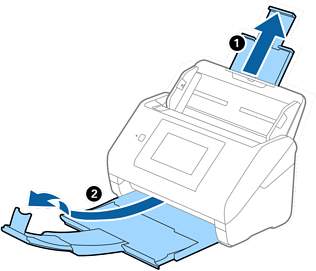
Extend the input tray extension. Slide out the output tray, extend the output tray extension, and then raise the stopper.
If there are any thick originals, to stop them from bumping into the output tray and falling out, store the output tray and do not use it to stack the ejected originals.
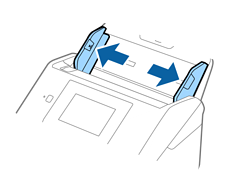
Slide the edge guides on the input tray all the way out.
Load the originals at the center of the input tray in descending order of paper size with the widest at the back and the narrowest at the front.
Check the following points when setting different sizes of originals.
Slide the originals with their leading edges aligned, until they meet resistance in the ADF.
Set the originals at the center of the input tray. Refer to the  mark on the scanner as your guide.
Set the originals straight.
If not, originals may be fed askew or jammed.

Load the originals into the input tray facing down and slightly displace the top edges at an angle facing into the ADF.
Slide the edge guides to fit the edges of the widest original.
