
You can place and scan batches of different size originals (50.8×50.8 mm (2.0×2.0 inches) to A4 or letter size) up to a total thickness of 2.4 mm (0.1 inches).
When placing and scanning originals that are a mixture of different sizes, originals may be fed askew because not all of the originals are supported by the edge guides.
Originals may be jammed or fed askew if you set different types or very different sizes of originals, such as in the following cases.
· Thin paper and thick paper
· A4 size paper and card size paper
· Combinations of long, narrow paper that extend far beyond the input tray extension (example: long receipts and so on)
· Combinations of folded or wrinkled paper
If originals are fed askew, check the scanned images. If the image is skewed, reduce the number of originals loaded and scan again.
Alternatively, you can scan originals of different paper types and thickness by loading them one by one using Automatic Feeding Mode.
To use Automatic Feeding Mode, make the appropriate settings on the Epson Scan 2 screen.
When you are using Epson ScanSmart, you can open the Epson Scan 2 screen by clicking the Settings button > Scanner Settings tab > Scan Settings.
On the Epson Scan 2 screen, use Automatic Feeding Mode to scan while switching the position of the scanner according to the type of document.
Make sure that the scanner position icon is  (vertical path position).
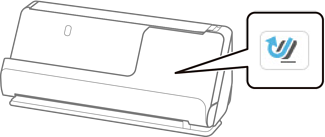
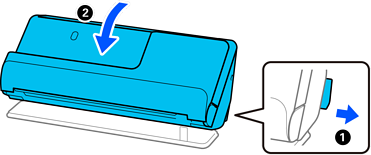
If  (straight path position) is displayed, pull the scanner position selector to tilt the scanner forward.
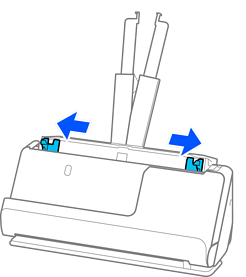
Open the input tray.
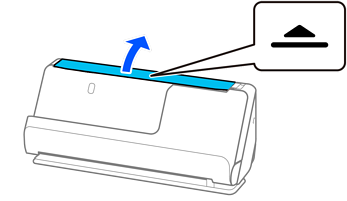
Raise the input tray extension.
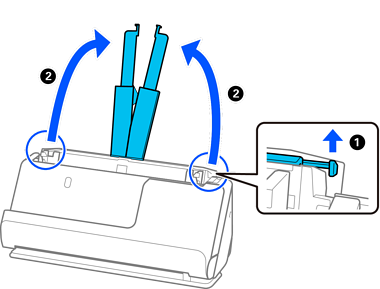
Move the edge guides to the edges of the input tray.
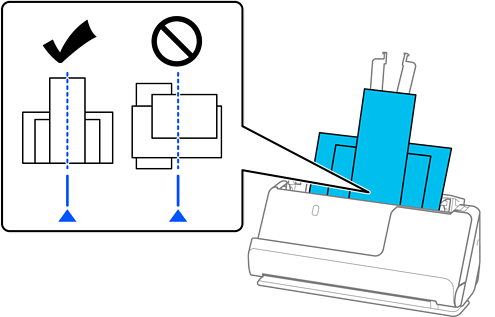
Load the originals with the side to be scanned facing up and in descending order of paper size with the widest at the back and the narrowest at the front of the input tray.
Check the following points when setting different sizes of originals.
Slide the originals with their leading edges aligned, until they meet resistance in the ADF.
Set the originals at the center of the input tray. Refer to the  mark on the scanner as your guide.
Set the originals straight.
If not, originals may be fed askew or jammed.
Align the edge guides with the widest original.
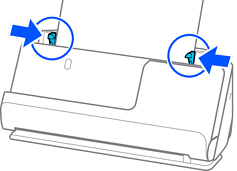
If the edge guides are too far apart or too tight, the original may not be fed correctly. The edge guides should be aligned so that they lightly touch the edges of the original.
If you cancel scanning in the middle of scanning a batch of originals, the second original will be fed a little bit into the ADF and then scanning stops. Open the scanner cover to remove it, and then load the page again together with the first page and the rest of the originals.
Depending on the type of paper and the environment in which the scanner is being used, the original may fall from the front of the scanner after scanning. In this situation, load fewer originals into the scanner than the specified number of originals that can be loaded.