
After using the scanner for a while, paper and room dust on the roller or the glass part inside the scanner may cause paper feed or scanned image quality problems. Clean the inside of the scanner every 5,000 scans.
You can check the latest number of scans on the control panel or in the Epson Scan 2 Utility.
If a surface is stained with a hard-to-remove material, use a genuine Epson cleaning kit to remove stains. Use a small amount of cleaner on the cleaning cloth to remove the stains.
Be careful not to get your hands or hair caught in the gears or rollers when cleaning the inside the scanner. This could cause an injury.
Never use alcohol, thinner, or any corrosive solvent to clean the scanner. Doing so could cause deformation or discoloration to occur.
Never spray any liquid or lubricant on the scanner. Damage to equipment or circuits may cause abnormal operations.
Never open the scanner case.
You can set cleaning time notifications and alerts after making a certain number of scans on the control panel or in the Epson Scan 2 Utility. By default, a notification is sent after every 5,000 scans.
Clean inside the scanner while it is turned on.
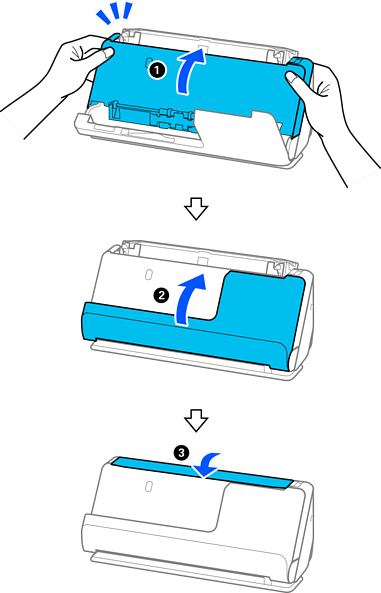
Wipe off any stains on the roller. Open the vertical path cover.
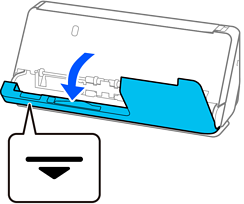
When opening the vertical path cover, hold the area indicated to avoid touching the antistatic brush. If the brush becomes bent it cannot eliminate static electricity, and this may cause the output originals to stick to each other.
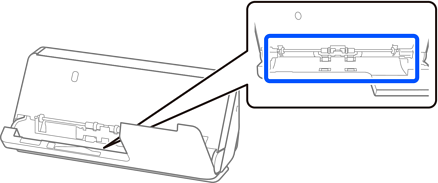
Wipe the rollers (4 locations) and the plastic rollers (4 locations). Wipe with a soft, lint-free cloth dampened with a small amount of dedicated cleaner or water.
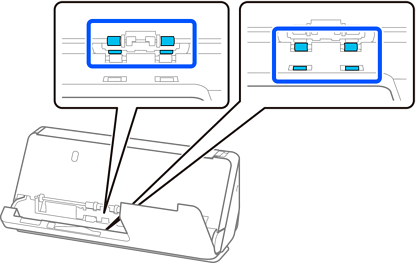
Be careful not to touch the antistatic brush when wiping the rollers. If the brush becomes bent it cannot eliminate static electricity, and this may cause the output originals to stick to each other.
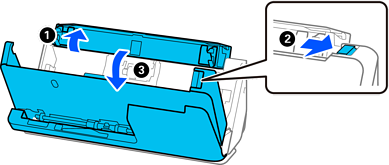
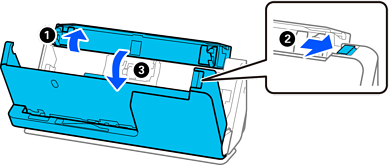
Open the input tray, and pull the lever to open the scanner cover.
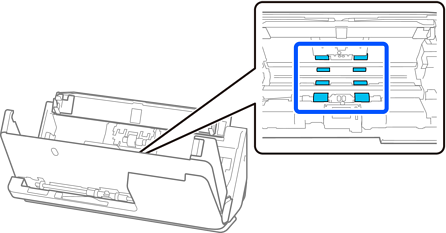
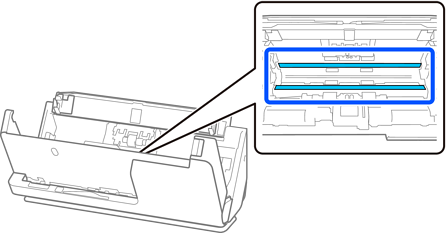
Wipe the rollers (8 locations). Wipe with a soft, lint-free cloth dampened with a small amount of dedicated cleaner or water.
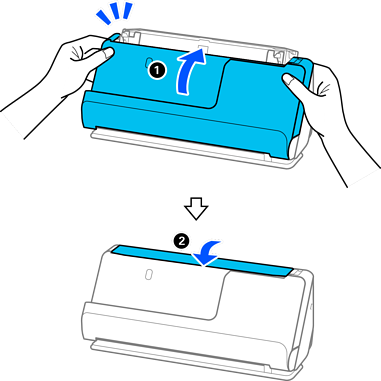
Close the scanner cover with both hands. Next, close the vertical path cover and then the input tray, in that order.
When the message Recovering is removed from the screen, proceed to the next step.
Repeat steps 1 to 5 four times.
The internal rollers rotate approximately one-quarter of a turn each time the cover is closed. Repeat this step until the entire roller is clean.
If paper dust adheres to the inside of the vertical path cover, wipe it off with a soft, lint-free cloth.
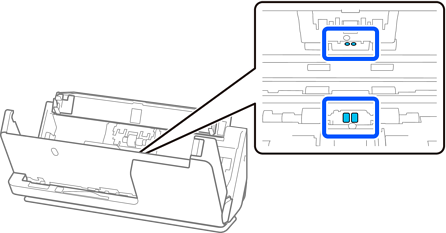
Wipe off any stains inside the scanner. Open the input tray, and pull the lever to open the scanner cover.
Wipe the glass surface inside the scanner cover. Wipe with a dedicated cleaning cloth or a soft, lint-free cloth. If the glass surface is very dirty, wipe with a soft, lint-free cloth dampened with a small amount of dedicated cleaner or water.
Do not place too much force on the glass surface.
Do not use a brush or a hard tool. Any scratches on the glass may affect the scan quality.
Do not spray cleaner directly onto the glass surface.
Wipe the sensors (4 locations) with a cotton swab.
Do not use liquid such as a cleaner on a cotton swab.
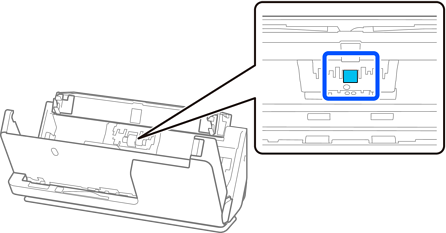
Wipe off any stains on the separation roller. Open the cover, and then remove the separation roller.
See “Replacing the Roller Assembly Kit” for more details.
Replacing the Roller Assembly Kit
Wipe the separation roller. Wipe with a soft, lint-free cloth dampened with a small amount of dedicated cleaner or water.
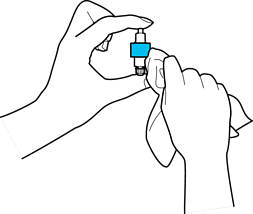
Use only a moist cloth to clean the roller. Using a dry cloth may damage the surface of the roller.
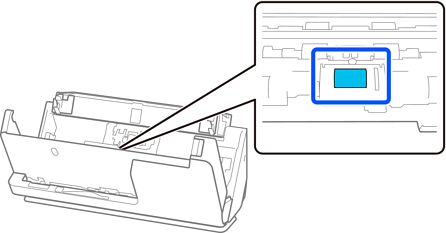
Install the separation roller.
See “Replacing the Roller Assembly Kit” for more details on installing.
Wipe off any stains on the pickup roller. Open the cover, and then remove the pickup roller.
See “Replacing the Roller Assembly Kit” for more details.
Replacing the Roller Assembly Kit
Wipe the pickup roller. Wipe with a soft, lint-free cloth dampened with a small amount of dedicated cleaner or water.

Use only a moist cloth to clean the roller. Using a dry cloth may damage the surface of the roller.
Install the pickup roller.
See “Replacing the Roller Assembly Kit” for more details on installing.
Close the scanner cover with both hands. Next, close the input tray.
Reset the scan number on the control panel.