
Create the print queue for network printing on the print server by using standard TCP/IP, and then set the network port.
This example is when using Windows 2012 R2.
Open the devices and printers screen.
Desktop > Settings > Control Panel > Hardware and Sound or Hardware > Devices and Printers.
Add a printer.
Click Add printer, and then select The printer that I want isn't listed.
Add a local printer.
Select Add a local printer or network printer with manual settings, and then click Next.
Select Create a new port, select Standard TCP/IP Port as the Port Type, and then click Next.

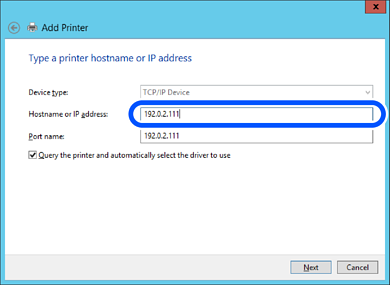
Enter the printer's IP address or printer name in Host Name or IP Address or Printer Name or IP Address, and then click Next.
Example:
Do not change Port name.
Click Continue when the User Account Control screen is displayed.
If you specify the printer name on the network where the name resolution is available, the IP address is tracked even if printer's IP address has been changed by DHCP. You can confirm the printer name from the network status screen on the printer's control panel or network status sheet.
Set the printer driver.
Follow the on-screen instructions.
When using the printer under the server / client connection (printer sharing using the Windows server), make the sharing settings hereafter.