
 You can also watch the procedure in the Web Movie Manuals. Access the following website.
https://support.epson.net/publist/vlink.php?code=VC00014
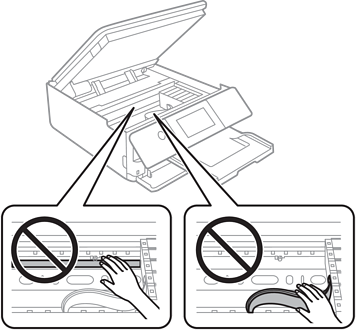
Be careful not to trap your hand or fingers when opening or closing the scanner unit. Otherwise you may be injured.
Never touch the buttons on the control panel while your hand is inside the printer. If the printer starts operating, it could cause an injury. Be careful not to touch the protruding parts to avoid injury.
Remove the rear cover.
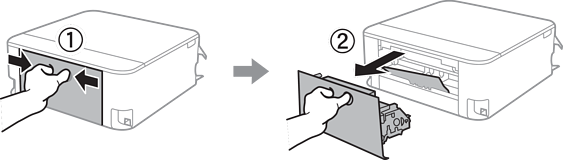
Remove the jammed paper.
Remove jammed paper from the rear cover.
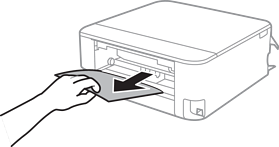
Insert the rear cover in the printer.
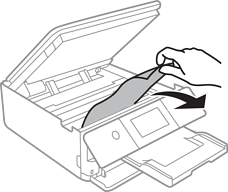
Open the scanner unit with the document cover closed.

Remove the jammed paper.
Do not touch the white flat cable and translucent film inside the printer. Doing so may cause a malfunction.
Close the scanner unit.
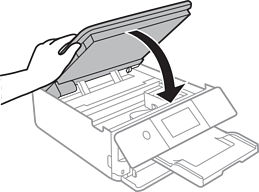
The scanner unit is designed to close slowly and resist a little as a precaution against catching fingers. Continue to close even if you feel some resistance.
Close the output tray.
Pull out the paper cassette.
For paper cassette 2, lift it up slightly, and then pull it out.

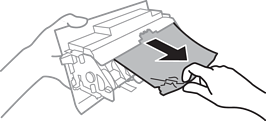
Remove the jammed paper.

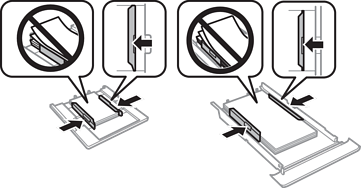
Align the edges of the paper and slide the edge guides to the edges of the paper.
Insert the paper cassette in the printer.