> Copying > Available Copying Methods > Copying by Creating Booklets or Sorting > Inserting Slip Sheets (Dividers) Between Copies

Inserting Slip Sheets (Dividers) Between Copies

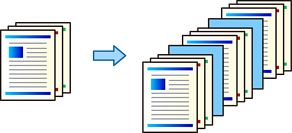
You can insert slip sheets (dividers) between copied paper for each specified number of copies or job.

You can also specify the page numbers where you insert a slip sheet or print the specified pages on different types of paper.

  1. Place the originals.

    Placing Originals

  2. Select Copy on the home screen.

  3. Select the Advanced tab, and then select Cover & Slip Sheet.

  4. Select End of Job or End of Set under Slip Sheet, enable the setting, and then specify other settings as necessary.

    If you want to specify the page numbers where you insert a slip sheet or print the specified pages on different types of paper, select End of Page or Chapter, and then specify the details such as the page number or other paper settings.

    End of Page or Chapter settings are saved for each page and displayed in a list.

    • When inserting a white slip sheet
      Select Not Set, and then select the following settings.
      Slip Sheet or Chapter:
      - Page: Specify the page to insert a slip sheet.
      - Print: Off
    • When using the same paper as the text for a slip sheet
      Select Not Set, and then select settings for the slip sheet.
      Slip Sheet or Chapter:
      - Page: Specify the page to insert a slip sheet.
      - Mode: Chapter
    • When using different paper than the text for a slip sheet
      Select the paper source where you loaded the paper in Paper Setting (Slip Sheet), select Not Set, and then select settings for the slip sheet.
      Slip Sheet or Chapter:
      - Page: Specify the page to insert a slip sheet.
      - Mode: Slip Sheet
  5. Set the number of copies.

    Note:

    If you select End of Page or Chapter and make multiple copies, we recommend that you select Proof Copy. You can make one copy to check the copy results, and then copy the remaining copies.

    Proof Copying

  6. Tap .