
The items may not be available depending on other settings you made.
Select the orientation of the original.
The Orientation (Original) setting is synced with the Scanning Side and Original Size settings. If you change the setting in any of them, the change is applied to all of them.
Select the scanning resolution.
See the following for details on the file resolutions that can be selected.
Rotate the scanned image clockwise. Select the rotation angle depending on the original you want to scan.
Remove the background color of the originals from the scanned image.
To use this feature, the background color of the originals should be the lightest color in the originals, and should be uniform. This feature is not applied correctly if there are patterns in the background, or there are text or illustrations which are a lighter color than the background.
Scans faint text or text that is difficult to read due to shading or background color so that it is easier to read.
Emphasize light letters / Remove background:
You can set the level of correction between text and background. When you move the slider closer to Emphasize light letters, the light letters in the scanned image are emphasized. When you move the slider closer to Remove background, the background color, pattern, wrinkles, or offset in the scanned image is removed.
Remove spot noise:
You can remove black dots in the background of the original that cannot be removed by lightening the background. You can adjust the level of the effect.
When you select this feature, it may also remove small dots as well as the black dots in the background.
Remove the shadows of the originals that appear in the scanned image.
Frame:
Remove the shadows at the edge of the originals.
Correct skew in the scanned image.
This feature may not be able to correct documents that have been over skewed.
After scanning once, you can scan additional originals using the same scan settings. If you have selected a multi-page file format, you can save all scanned images as a single file.
When scanning is complete, place the next original, and then tap Start Scanning.
After scanning all of the originals, tap Last Original to save the image.
Use the scanner glass to scan the front and back of the ID card separately, then save the scans side by side as a single image.
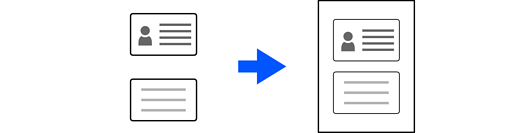
The scanned image is automatically cropped with a margin of approximately 3 mm (0.12 in.).
Follow the steps below to scan the front and back sides in order.
Layout:
Select the layout to be used for the front and back sides when saving the image.