
After using the scanner for a while, paper powder and room dust may accumulate in the ADF cause problems with paper feed or scanned image quality. Clean the ADF after every 5,000 scans.
You can use the control panel or the Epson Scan 2 Utility to obtain information about the number of scans performed by the product.
If a surface is stained with a hard-to-remove material, you can use a genuine Epson cleaning kit to remove the stains. Use a small amount of cleaner on the cleaning cloth to remove the stains. The cleaning kit is not available in some regions.
Be careful not to get your hands or hair caught in the gears or rollers when cleaning the ADF. This could cause an injury.
Never use alcohol, thinner, or any corrosive solvent to clean the scanner. Doing so could cause deformation or discoloration to occur.
Never spray any liquid or lubricant on the scanner. Damage to equipment or circuits may cause abnormal behavior from the product.
Never open the scanner case.
You can use the control panel or Epson Scan 2 Utility to configure cleaning time notifications and alerts. By default, a notification is sent after every 5,000 scans.
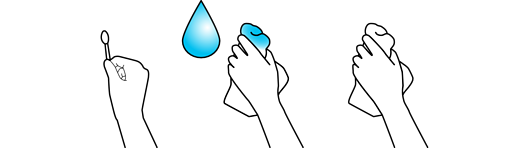
Obtain a cotton swab, a soft cloth dampened with water, and a dry soft cloth.
Open the ADF cover.
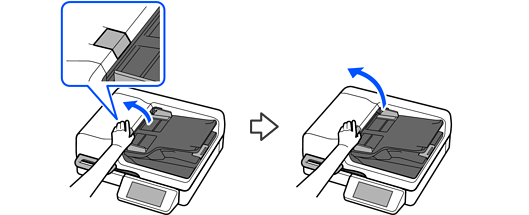
With the ADF cover open, open the document cover.

Using the dry cotton swab, wipe off any stains from the area shown in the illustration.
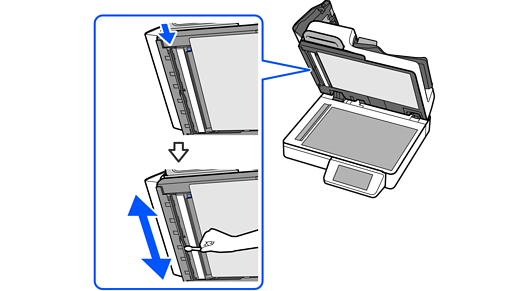
Close the cover gently.
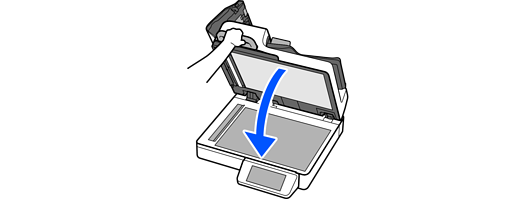
Wipe off any stains from the area shown in the illustration.
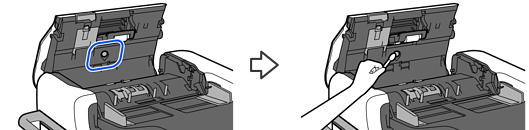
If the cotton swab is dirty, replace it with a new one before performing this step.
Wipe off any stains from the area shown in the illustration.
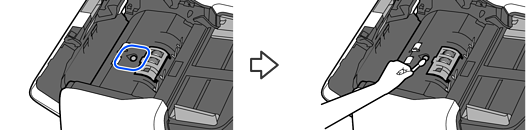
If the cotton swab is dirty, replace it with a new one before performing this step.
Remove the pickup roller cover.
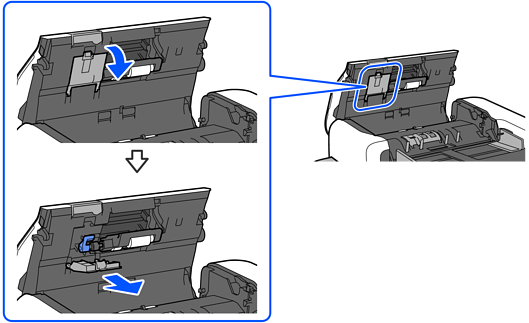
Remove the pickup roller.
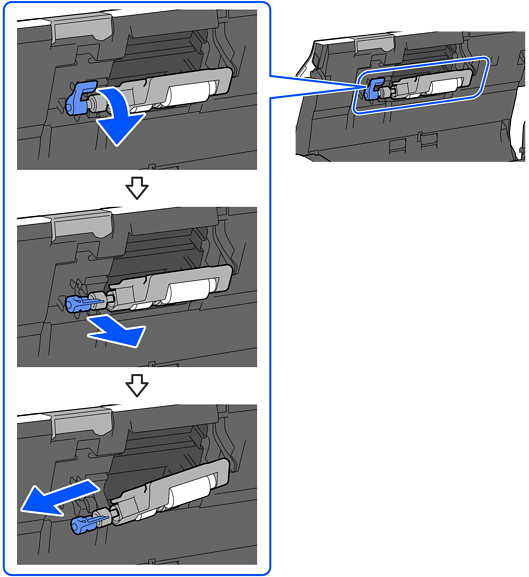
Do not pull out the pickup roller forcibly. This could damage the inside of the scanner.
Do not touch the surface of the roller with your fingers.
Using the soft cloth dampened with water, wipe off any stains on the roller surfaces.
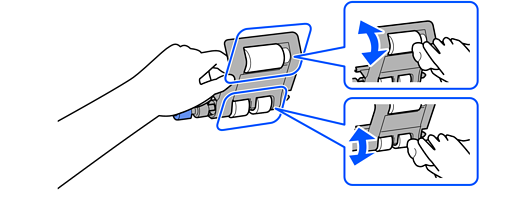
Hold the plastic frame of the pickup roller when cleaning. Do not touch the surface of the roller with your fingers.
Reinstall the pickup roller.
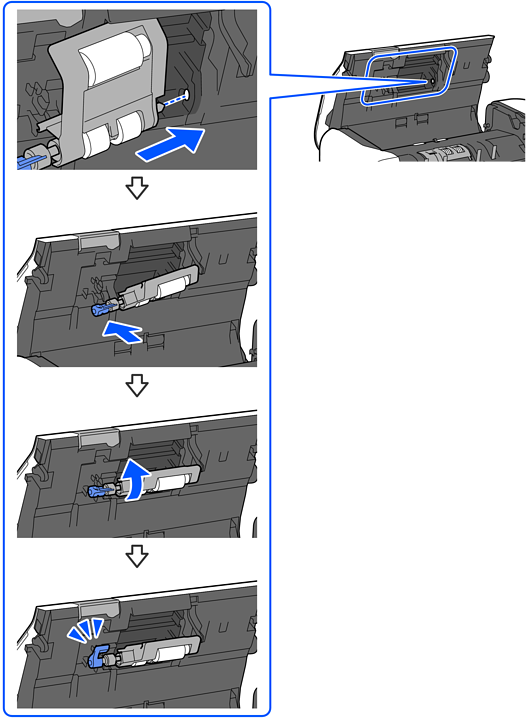
Do not touch the surface of the roller with your fingers.
Reinstall the pickup roller cover.
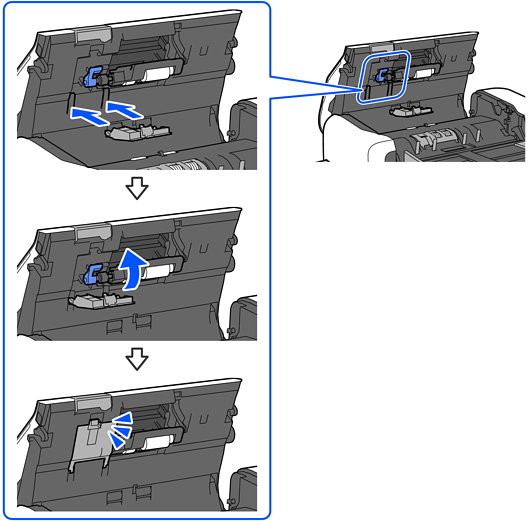
Make sure the cover is closed correctly.
Make sure the cover hinges are not protruding and the cover is closed correctly.
If the cover is hard to close, make sure the pickup roller is installed correctly.
Wipe off any stains from the area shown in the illustration.
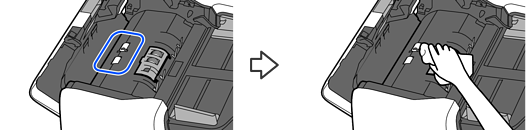
Do not touch the surface of the roller with your fingers.
Remove the separation roller cover.
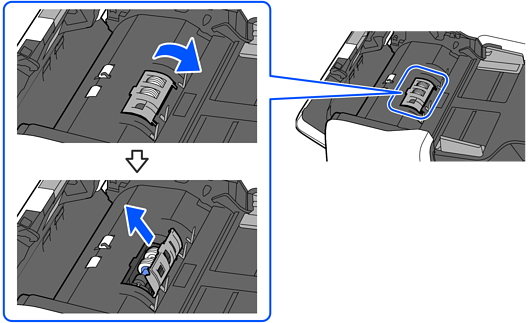
Remove the separation roller.
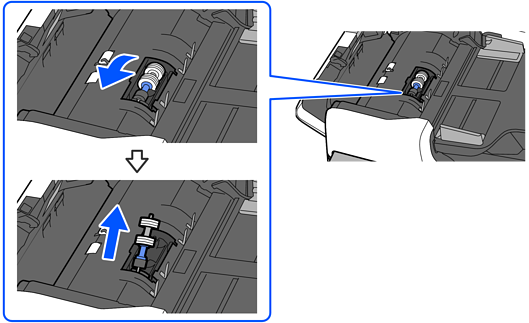
When picking up the separation roller, hold the sides of the roller and lift it up. Do not touch the surface of the roller with your fingers.
Wipe off any stains on the roller.
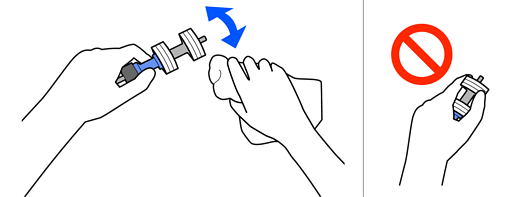
When cleaning, hold the plastic section of the separation roller. Do not touch the surface of the roller with your fingers.
Reinstall the separation roller.
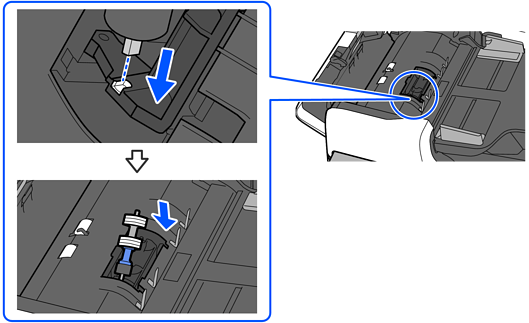
When installing the separation roller, hold the sides of the roller. Do not touch the surface of the roller with your fingers.
Reinstall the separation roller cover.
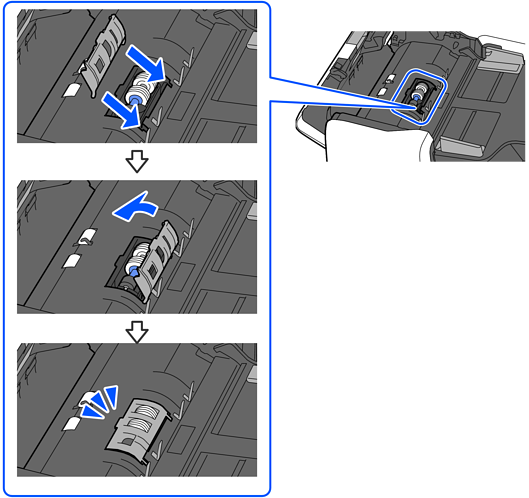
If the cover is hard to close, make sure the separation rollers are installed correctly, and that the protruding parts are aligned.
Close the ADF cover.

Open the document cover.

Open the cover under the document mat.
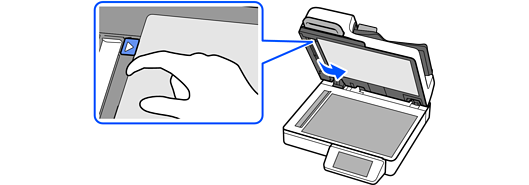
Be careful not to fold or damage the document mat.
Using the soft cloth dampened with water, wipe off any stains from the area shown in the illustration.
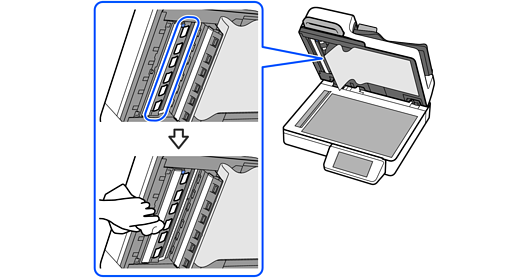
Using the dry soft cloth, wipe off any stains from the area shown in the illustration.
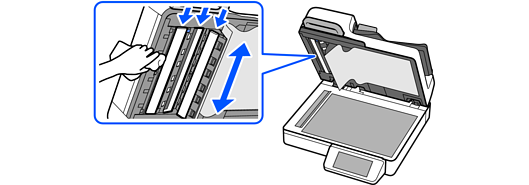
Close the cover under the document mat.
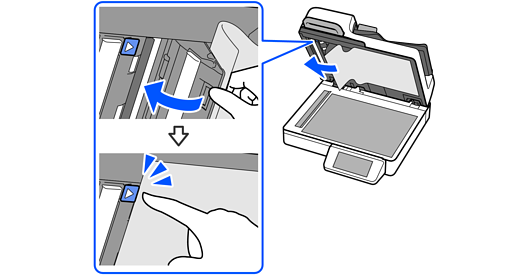
Wipe off any stains from the area shown in the illustration.
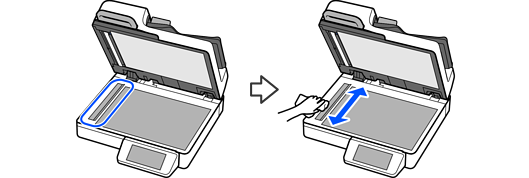
Wipe off any stains from the area shown in the illustration.
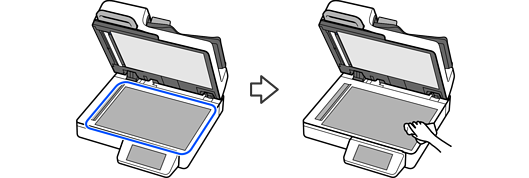
Close the cover gently.

Reset the number of scans using the control panel or the Epson Scan 2 Utility.