Before Using the Product
Part Names
Setup
Basic Operations
Cleaning
Troubleshooting
Appendix
Top > Setup > Connecting the Printer's Wireless LAN Unit
Connecting the Printer's Wireless LAN Unit
When the Wireless LAN unit is connected to the printer's USB connector and there are no free USB connectors, you can use the Wireless LAN unit and the customer display at the same time by connecting the Wireless LAN unit to the USB connector on this device.
 Note:
Note:You can only use the optional Wireless LAN unit supported by the TM printer.
Follow the steps below to connect the Wireless LAN unit to the device's USB connector.
-
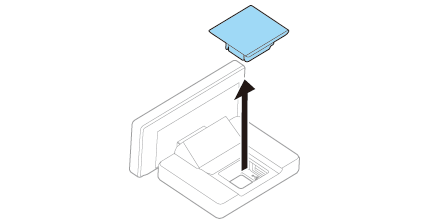
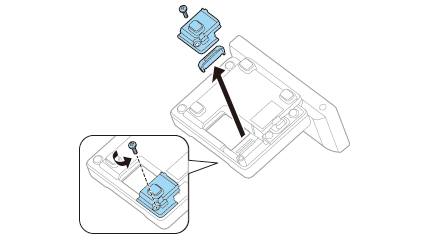
Remove the covers for the stand and the bottom as shown in the illustration.
-
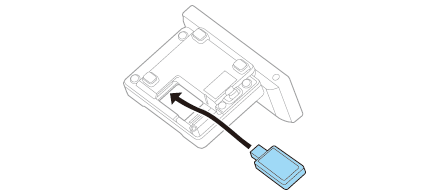
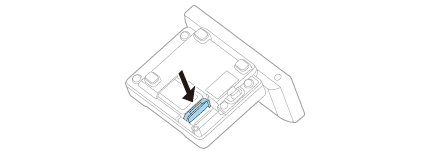
Connect the Wireless LAN unit to the Wireless LAN unit connector.
-
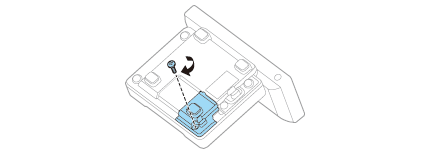
Reattach the cover for the bottom. Keep the cover for the stand removed.
-
Do not place anything in the upper section (cover opening) of the Wireless LAN unit. If heat is not allowed to dissipate when using the product, it may lead to a malfunction.
-
Do not use a USB extension cable. Operational errors may occur due to a drop in voltage.
 CAUTION:Note:
Install dividers if necessary depending on the length of the Wireless LAN unit.
Before Using the Product
Part Names
Setup
Basic Operations
Cleaning
Troubleshooting
Appendix
Top > Setup > Connecting the Printer's Wireless LAN Unit
Connecting the Printer's Wireless LAN Unit
When the Wireless LAN unit is connected to the printer's USB connector and there are no free USB connectors, you can use the Wireless LAN unit and the customer display at the same time by connecting the Wireless LAN unit to the USB connector on this device.
Note:You can only use the optional Wireless LAN unit supported by the TM printer.
Follow the steps below to connect the Wireless LAN unit to the device's USB connector.
-
Remove the covers for the stand and the bottom as shown in the illustration.
-
Connect the Wireless LAN unit to the Wireless LAN unit connector.
-
Reattach the cover for the bottom. Keep the cover for the stand removed.
-
Do not place anything in the upper section (cover opening) of the Wireless LAN unit. If heat is not allowed to dissipate when using the product, it may lead to a malfunction.
-
Do not use a USB extension cable. Operational errors may occur due to a drop in voltage.
CAUTION:Note:Install dividers if necessary depending on the length of the Wireless LAN unit.