Exporting Data to Xero
-
Load the invoices or receipts in your scanner.
Note:See the User's Guide supplied with the scanner for details on loading originals.
-
Press the
 button on the scanner.
The originals start scanning and Epson ScanSmart opens.
Note:You can also start scanning from your computer.
Open Epson ScanSmart and then click one of the SCAN options.

-
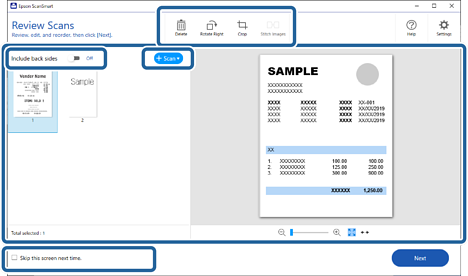
Check the scanned images, and organize them if necessary.
-
You can also scan and add originals from Scan.
-
You can choose to keep or discard the back sides of double-sided scanned images from Include back sides.
-
You can use the buttons at the top of the screen to delete, rotate, crop, or merge the scanned images.
-
If you do not want to organize scanned images each time, select Skip this screen next time.
-
-
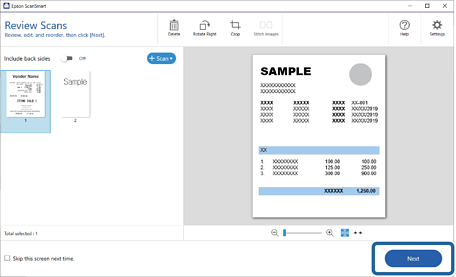
Click Next.
-
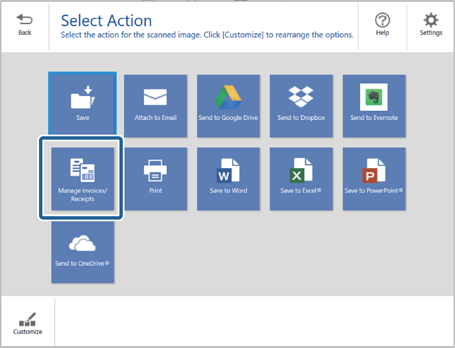
Click Manage Invoices/Receipts on the Select Action window.
 Note:
Note:When the Import from account services window is displayed, click Close or select where you want to import the items from and click Import.
-
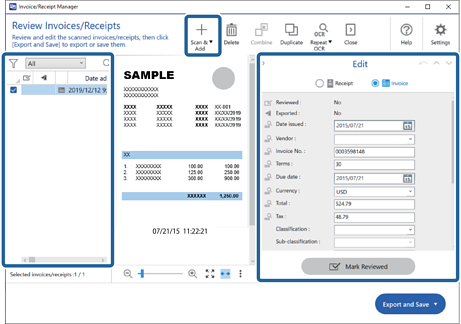
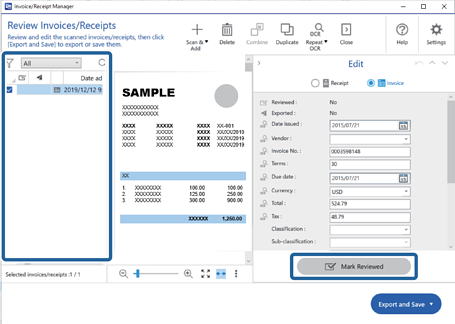
Check the result and edit the automatically detected information if necessary.
If the Edit window is not displayed, double-click the invoice or receipt from the list or click Edit and Review to display.
If you want to add more scanned invoices or receipts, click Scan & Add.
 Note:
Note:Depending on the condition of your originals, OCR (Optical Character Recognition) may not recognize text correctly. Check the following.
-
The originals are placed straight.
-
The originals have clear text.
-
-
Click Mark Reviewed.
Repeat editing and reviewing until all of the invoice or receipt data has been reviewed.
 Important:
This is registered as accounting data. Be sure to check carefully that the numbers are correct.
Note:-
After reviewing invoices or receipts, they are marked as reviewed in the list in the
 column.
-
You can sort and search the data from the column at the top of the list.
-
-
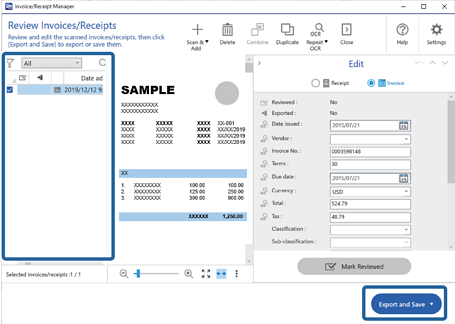
Select the invoices or receipts you want to export or save from the list, and then click Export and Save.
 Note:
Note:After exporting invoices or receipts to an accounting service, they are marked as sent in the list in the
 column.
-
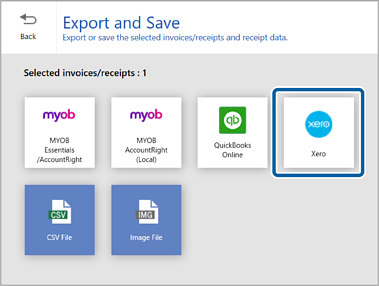
Select Xero.
-
Select your company name, the import destination, and then click OK.
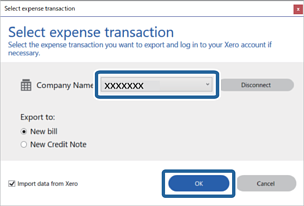
When the completion screen is displayed, the accounting information from your scanned invoices or receipts is sent to Xero.