
Before Using the Printer
Product Models and Supported Interfaces
Part Names
Setup
Checking/Changing the Installation DirectionChanging the Paper WidthConnecting CablesConnecting Smart DevicesUsing the Power Switch Cover
Basic Operations
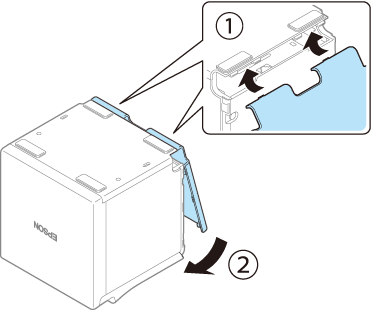
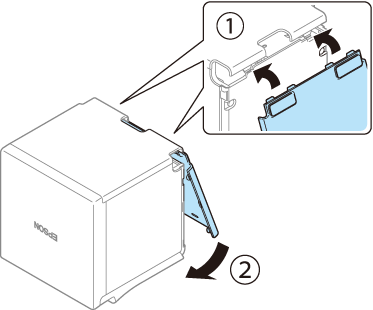
Turning the Power On/OffRemoving the Covers (Rear and Bottom)Attaching the Covers (Rear and Bottom)Installing or Replacing the Roll Paper
Cleaning
Troubleshooting
About the QR Code LabelMeanings of LED IndicationsPrintout is FaintCannot PrintWhen the Roll Paper Jams
Appendix
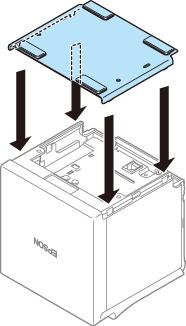
Top > Basic Operations > Attaching the Covers (Rear and Bottom)
Attaching the Covers (Rear and Bottom)
Depending on attachment positions of the covers, paper eject position changes. Decide from which way to eject paper according to the installation location of the printer.
Before Using the Printer
Product Models and Supported Interfaces
Part Names
Setup
Checking/Changing the Installation DirectionChanging the Paper WidthConnecting CablesConnecting Smart DevicesUsing the Power Switch Cover
Basic Operations
Turning the Power On/OffRemoving the Covers (Rear and Bottom)Attaching the Covers (Rear and Bottom)Installing or Replacing the Roll Paper
Cleaning
Troubleshooting
About the QR Code LabelMeanings of LED IndicationsPrintout is FaintCannot PrintWhen the Roll Paper Jams
Appendix
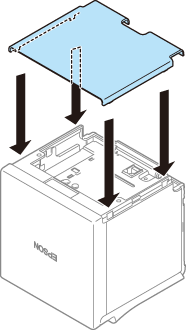
Top > Basic Operations > Attaching the Covers (Rear and Bottom)
Attaching the Covers (Rear and Bottom)
Depending on attachment positions of the covers, paper eject position changes. Decide from which way to eject paper according to the installation location of the printer.