/
Scanning /
Scanning Using the Control Panel /
Scanning to a Computer /
Making Custom Settings in Epson Event Manager
Making Custom Settings in Epson Event Manager
You can set the scan settings for Follow custom setting in Epson Event Manager.
See the Epson Event Manager help for details.
-
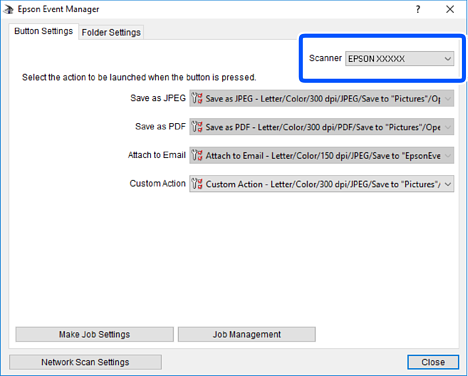
Start Epson Event Manager.
-
Make sure that your scanner is selected as the Scanner on the Button Settings tab on the main screen.
-
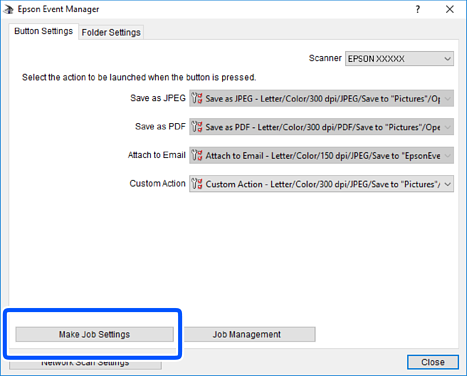
Click Make Job Settings.
-
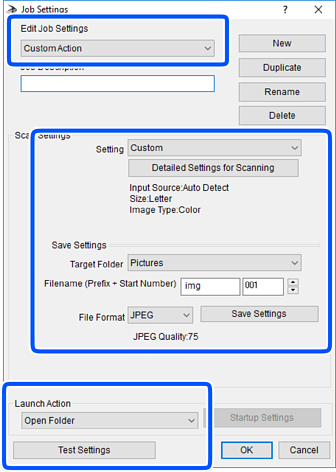
Make scan settings on the Job Settings screen.
-
Edit Job Settings: Select Custom Action.
-
Setting: Scan using the best settings for the selected type of original. Click Detailed Settings for Scanning to set the items such as the resolution or the color for saving the scanned image.
-
Target Folder: Select the save folder for the scanned image.
-
Filename (Prefix + Start Number): Change the settings for the file name you want to save.
-
File Format: Select the save format.
-
Launch Action: Select the action when scanning.
-
Test Settings: Starts test scanning using current settings.
-
-
Click OK to return to the main screen.
-
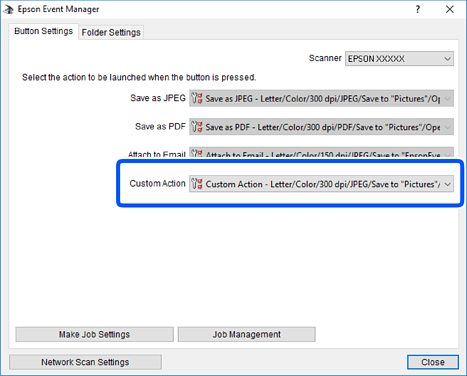
Make sure that the Custom Action is selected on the Custom Action list.
-
Click Close to close Epson Event Manager.