Scanning to a Computer (Event Manager)
Before scanning, install Epson Scan 2 and Epson Event Manager on your computer.
-
Place the originals.
-
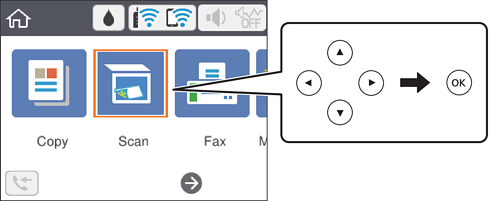
Select Scan on the home screen.
To select an item, use the


 buttons, and then press the
OK button.
buttons, and then press the
OK button.
-
Select Computer.
-
Select the computer to which you want to save the scanned images.
-
If the Select Computer screen is displayed, select the computer from the screen.
-
If the Scan to Computer screen is displayed and the computer is already selected, make sure the selected computer is correct. If not, select
 to reselect the computer.
Note:-
When the printer is connected to a network, you can select the computer to which you want to save the scanned image. You can display up to 20 computers on the printer's control panel. If you set Network Scan Name (Alphanumeric) on Epson Event Manager, it is displayed on the control panel.
-
-
Select
 to select how to save the scanned image to a computer.
-
Save as JPEG: Saves the scanned image in JPEG format.
-
Save as PDF: Saves the scanned image in PDF format.
-
Attach to e-mail: Starts the email client on your computer, and then automatically attaches it to an email.
-
Follow custom setting: Saves the scanned image using the settings on the Epson Event Manager. You can change the scan settings such as the scanning size, folder to save to, or save format.
-
-
Press the
 button.
