Top > Setup > Installing the Stand
Installing the Stand
Install the stand on a flat stable surface.
 Note:
Note:-
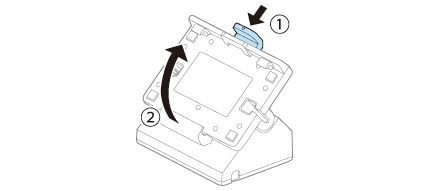
The front lever is in the up position when the product is shipped. Before you start the installation, rotate the holder so that the front lever is in the down position.
-
When using a large size tablet (a height is 192 mm (7.56") or larger), replace Bottom cover A with Bottom cover B.
-
When securing the stand to the installation surface, secure the bottom cover using the screws, and then use the affixing tape for the bottom cover and the installation surface.
a: screws
b: affixing tape

Top > Setup > Installing the Stand
Installing the Stand
Install the stand on a flat stable surface.
Note:-
The front lever is in the up position when the product is shipped. Before you start the installation, rotate the holder so that the front lever is in the down position.
-
When using a large size tablet (a height is 192 mm (7.56") or larger), replace Bottom cover A with Bottom cover B.
-
When securing the stand to the installation surface, secure the bottom cover using the screws, and then use the affixing tape for the bottom cover and the installation surface.
a: screws
b: affixing tape