
Before Using the Printer
Part Names
Setup of the Tablet
Setup of the Printer
Basic Operations
Cleaning
Troubleshooting
Using the Optional Products
Appendix
Top > Setup of the Tablet > Mounting the Front Tablet
Mounting the Front Tablet
Follow the procedure below to mount the front tablet to the printer.
-
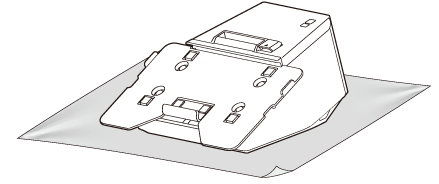
Put the printer on a soft cloth or cushioning material.
-
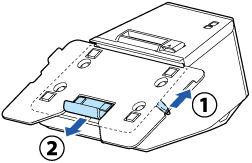
Operate the lock lever to extend the lower tablet holder.
-
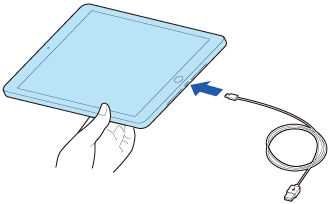
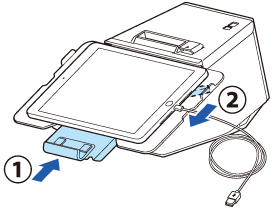
Connect the cable to the front tablet.
-
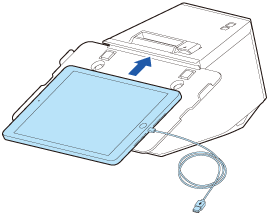
Place the tablet so that its upper edge contacts with the upper tablet holder.
-
Move the lower tablet holder up to sandwich the tablet between the two holders, and then operate the lock lever to secure the tablet.
-
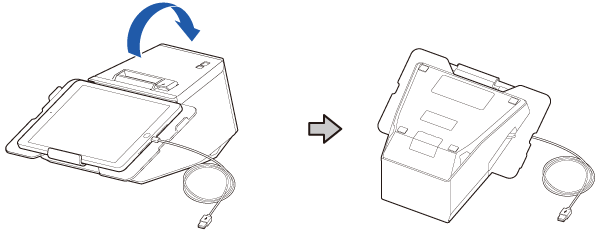
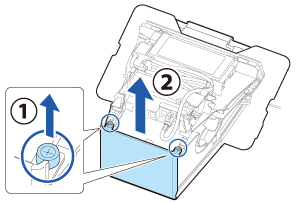
Turn over the printer.
-
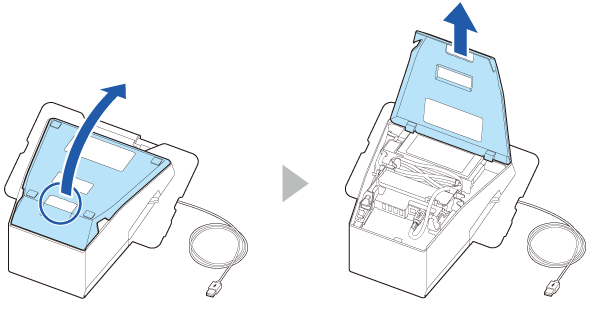
Remove the bottom cover.
-
Remove the side covers.
-
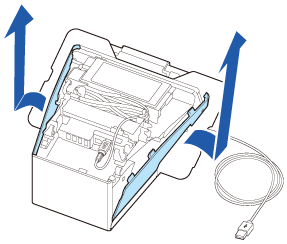
Remove the rear cover.
-
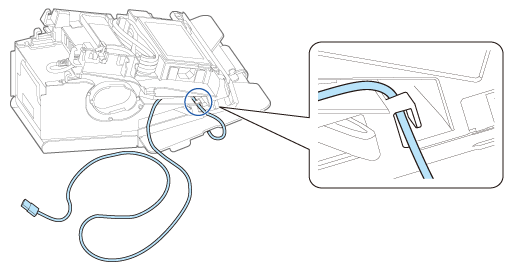
Pass the cable through the hook on the side.
-
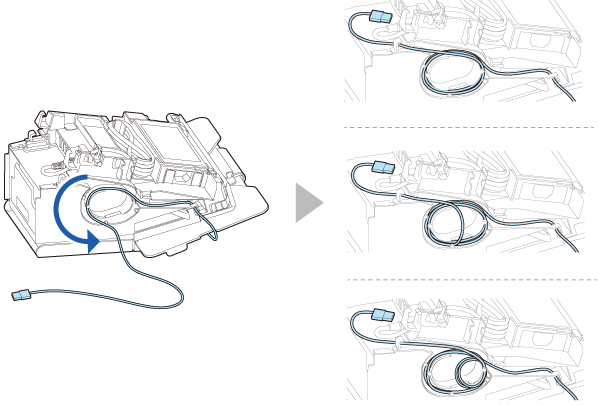
Roll up the cable on the side as shown below to adjust the cable length.
-
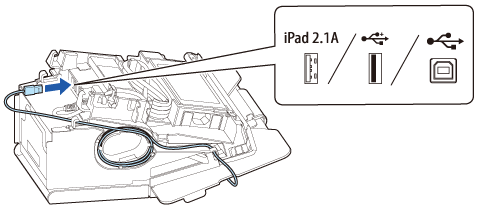
Connect the cable to the appropriate USB connector.
 CAUTION:
If the tablet sticks out from the tablet table, replace the tablet table with the large one.

 Note:
Note:If your tablet is not allowed to connect to the connector of the printer, pull its cable out through the cutout of the printer.
Before Using the Printer
Part Names
Setup of the Tablet
Setup of the Printer
Basic Operations
Cleaning
Troubleshooting
Using the Optional Products
Appendix
Top > Setup of the Tablet > Mounting the Front Tablet
Mounting the Front Tablet
Follow the procedure below to mount the front tablet to the printer.
-
Put the printer on a soft cloth or cushioning material.
-
Operate the lock lever to extend the lower tablet holder.
-
Connect the cable to the front tablet.
-
Place the tablet so that its upper edge contacts with the upper tablet holder.
-
Move the lower tablet holder up to sandwich the tablet between the two holders, and then operate the lock lever to secure the tablet.
-
Turn over the printer.
-
Remove the bottom cover.
-
Remove the side covers.
-
Remove the rear cover.
-
Pass the cable through the hook on the side.
-
Roll up the cable on the side as shown below to adjust the cable length.
-
Connect the cable to the appropriate USB connector.
CAUTION:If the tablet sticks out from the tablet table, replace the tablet table with the large one.
Note:If your tablet is not allowed to connect to the connector of the printer, pull its cable out through the cutout of the printer.