Introduction to Your LABELWORKS Printer
Setting Up the Printer
Using the Label Printer With Your Mobile Device
Using the Printer With Your Computer
Applying Your Labels
Cleaning the Printer
Solving Problems
Technical Specifications
Notices
Top > Setting Up the Printer > Inserting Tape Cartridges
Inserting Tape Cartridges
You can use tapes with widths ranging from approximately 4 mm to 18 mm.
Use only tape cartridges with the mark  .
.
 Caution CautionMake sure the power is off before you install a tape cartridge. |
-
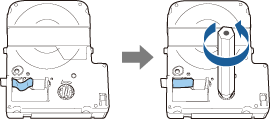
Remove any slack from the ribbon using a pencil or pen.
-
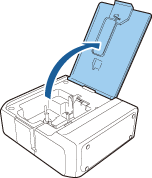
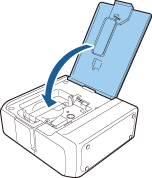
Lift up the tape cover.
-
Insert the cartridge as shown and press it down firmly until it snaps into place.
-
Close the tape cover.
Make sure the end of the tape slides into the ejection slot.

Introduction to Your LABELWORKS Printer
Setting Up the Printer
Using the Label Printer With Your Mobile Device
Using the Printer With Your Computer
Applying Your Labels
Cleaning the Printer
Solving Problems
Technical Specifications
Notices
Top > Setting Up the Printer > Inserting Tape Cartridges
Inserting Tape Cartridges
You can use tapes with widths ranging from approximately 4 mm to 18 mm.
Use only tape cartridges with the mark .
|
Caution Make sure the power is off before you install a tape cartridge. |
-
Remove any slack from the ribbon using a pencil or pen.
-
Lift up the tape cover.
-
Insert the cartridge as shown and press it down firmly until it snaps into place.
-
Close the tape cover.
Make sure the end of the tape slides into the ejection slot.