Before Using the Product
Part Names
Setup
Basic Operations
Installing the Product in Various Ways
Cleaning
Troubleshooting
Appendix
Top > Installing the Product in Various Ways > Attaching the CRANK POLE UNIT FOR TM-T88VI-DT2 (DP-71)
Attaching the CRANK POLE UNIT FOR TM-T88VI-DT2 (DP-71)
Follow the procedure below to attach the optional kit, CRANK POLE UNIT FOR TM-T88VI-DT2 (DP-71).
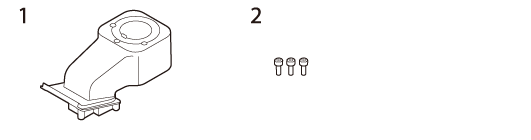
Contents of the DP-71 package
1. Crank pole
2. Three screws
-
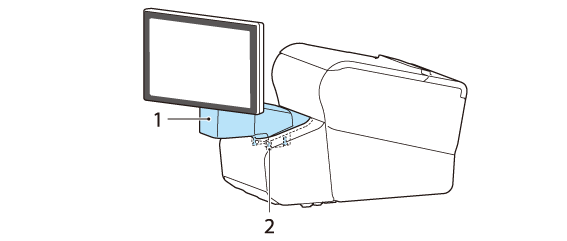
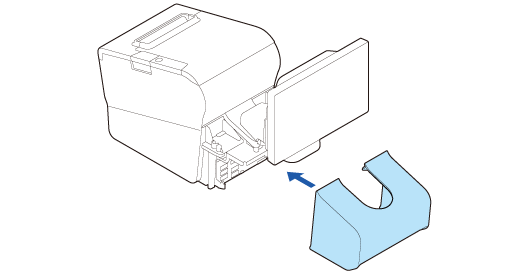
Remove the connector cover of the TM-T88VI-DT2.
-
Remove the U-shape part from the connector cover.
-
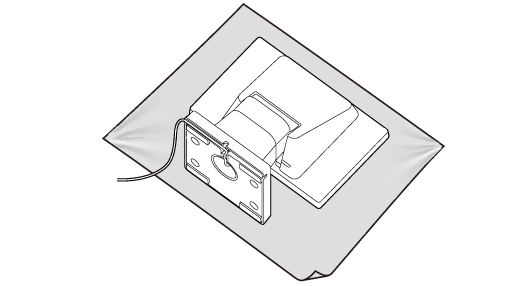
Place the product screen-side down on a soft cloth or the like.
-
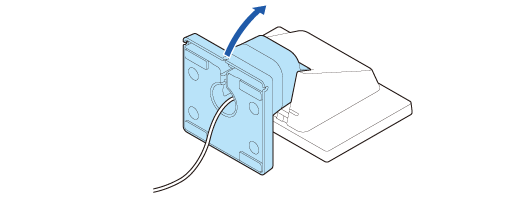
Raise the stand.
-
Push the tabs inward and pull out the stand.
-
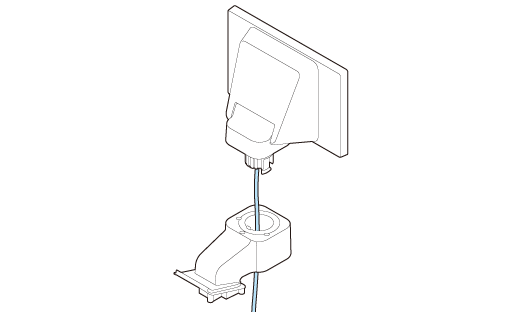
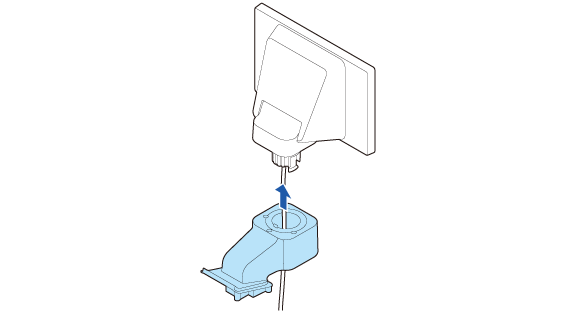
Pass the USB cable through the crank pole.
-
Attach the crank pole to the display as shown below.
-
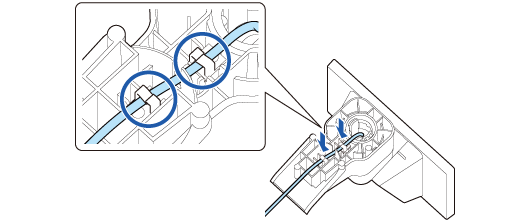
Secure the USB cable to the crank pole.
-
Lay TM-T88VI-DT2 on its side.
-
Pass the USB cable through the TM-T88VI-DT2.
-
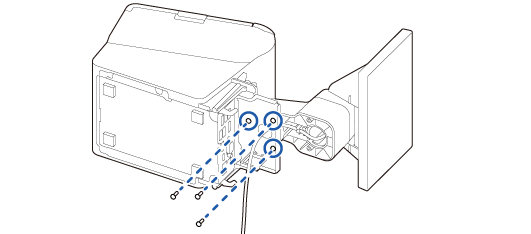
Secure the display and crank pole with the three screws.
-
Connect the USB cable to the connector on the TM-T88VI-DT2.
-
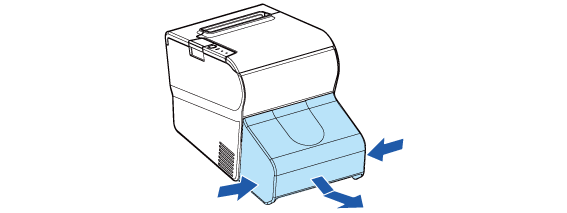
Attach the connector cover.
Push both lower sides of the cover inward to disengage the hooks, and remove the cover.


Before Using the Product
Part Names
Setup
Basic Operations
Installing the Product in Various Ways
Cleaning
Troubleshooting
Appendix
Top > Installing the Product in Various Ways > Attaching the CRANK POLE UNIT FOR TM-T88VI-DT2 (DP-71)
Attaching the CRANK POLE UNIT FOR TM-T88VI-DT2 (DP-71)
Follow the procedure below to attach the optional kit, CRANK POLE UNIT FOR TM-T88VI-DT2 (DP-71).
Contents of the DP-71 package
1. Crank pole
2. Three screws
-
Remove the connector cover of the TM-T88VI-DT2.
-
Remove the U-shape part from the connector cover.
-
Place the product screen-side down on a soft cloth or the like.
-
Raise the stand.
-
Push the tabs inward and pull out the stand.
-
Pass the USB cable through the crank pole.
-
Attach the crank pole to the display as shown below.
-
Secure the USB cable to the crank pole.
-
Lay TM-T88VI-DT2 on its side.
-
Pass the USB cable through the TM-T88VI-DT2.
-
Secure the display and crank pole with the three screws.
-
Connect the USB cable to the connector on the TM-T88VI-DT2.
-
Attach the connector cover.
Push both lower sides of the cover inward to disengage the hooks, and remove the cover.