Before Using the Printer
Part Names and Functions
Setting Up
Basic Operations
Useful Functions
Creating a Label with a Special Form
Cleaning the Printer
Preference
Troubleshooting
Product Specifications
Symbol, Accent Mark, Frame
Top > Setting Up > Preparing the power supply
Preparing the power supply
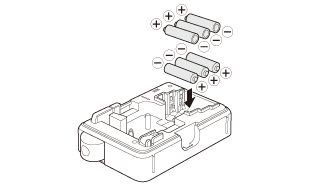
 Note NotePrepare 6 AA batteries. Either alkaline or rechargeable nickel metal hydride batteries can be used. |
-
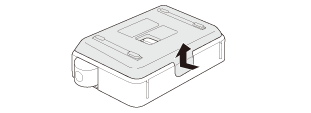
Open the cover on the rear.
-
Insert the batteries.
-
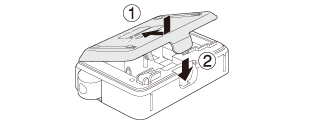
Close the cover. Close it until it snaps into place.
|
Note When using rechargeable nickel metal hydride batteries, change the battery type setting under "BattTyp" in the preference menu. |

|
Note When continuing to install a tape cartridge, leave the cover off and go to Inserting or removing tape cartridge. |
Before Using the Printer
Part Names and Functions
Setting Up
Basic Operations
Useful Functions
Creating a Label with a Special Form
Cleaning the Printer
Preference
Troubleshooting
Product Specifications
Symbol, Accent Mark, Frame
Top > Setting Up > Preparing the power supply
Preparing the power supply
|
Note Prepare 6 AA batteries. Either alkaline or rechargeable nickel metal hydride batteries can be used. |
-
Open the cover on the rear.
-
Insert the batteries.
-
Close the cover. Close it until it snaps into place.
|
Note When using rechargeable nickel metal hydride batteries, change the battery type setting under "BattTyp" in the preference menu. |
|
Note When continuing to install a tape cartridge, leave the cover off and go to Inserting or removing tape cartridge. |