-
-
-
-
Printing from the Print Photos Menu on the Control Panel
-
-
-
Network Service and Software Information
-
Application for Scanning Documents and Images (Epson Scan 2)
-
Application for Configuring Scanning Operations from the Control Panel (Epson Event Manager)
-
Application for Quick and Fun Printing from a Computer (Epson Photo+)
-
Application for Easily Operating the Printer from a Smart device (Epson Smart Panel)
-
Application for Scanning and Transferring Images (Easy Photo Scan)
-
Application for Updating Software and Firmware (Epson Software Updater)
-
Application for Setting up the Device on a Network (EpsonNet Config)
-
-
-
Basic Operations for Printing Photos
-
Load paper in the printer.
-
Insert a memory card into the memory card slot of the printer.
-
When a message telling you that loading photos is complete is displayed, press the OK button.
-
Select Print Photos on the control panel.
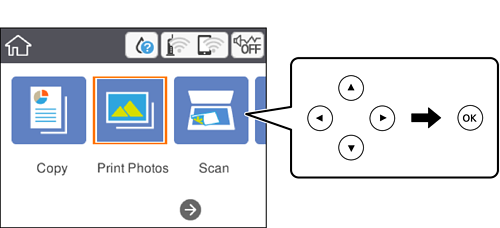
To select an item, move the focus to the item using the


 buttons, and then press the OK button.
-
Select Print.
-
Select the photo you want to print on the select photo screen.
Note:Select
 at the top right of the screen to display the Select Photo Menu. If you specify a date by using Browse, only photos of the specified date are displayed.
-
Set the number of prints using the - or + button.
When printing more than one photo, display the photos using the
or button, and then set the number of prints.
-
Select Print Settings to make paper and print settings.
-
Press the
button.
-
Press the
 button to edit the photos as necessary.
-
Slide out the output tray.
-
Enter the number of copies, and then press the
 button.
-
Confirm that printing is complete, and then select Close.
If you notice print quality problems such as banding, unexpected colors, or blurry images, select Troubleshooting to see the solutions.
