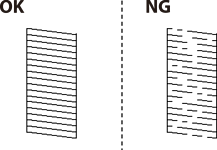
If you notice a misaligned vertical lines, blurred images, or horizontal banding, adjust the print quality. If you want to adjust the print quality per paper, make this setting first. The setting value per paper is reset if you make this setting after adjusting per paper.
Select Maintenance on the printer's control panel.
Select Print Quality Adjustment.
Follow the on-screen instructions to print the alignment pattern and scan it.
Adjustments are performed automatically.
If a message asking you to print the maintenance check sheet is displayed on the control panel, go to the next step.
Follow the on-screen instructions to print the maintenance check sheet.
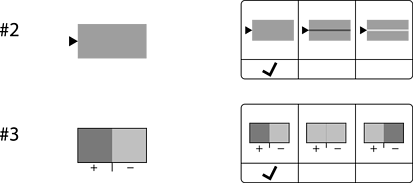
Check each pattern to perform adjustments.

